 Home
Home
 Suppliers
The Whole Works
The Whole Works
By Louise Baltruschat Hollis
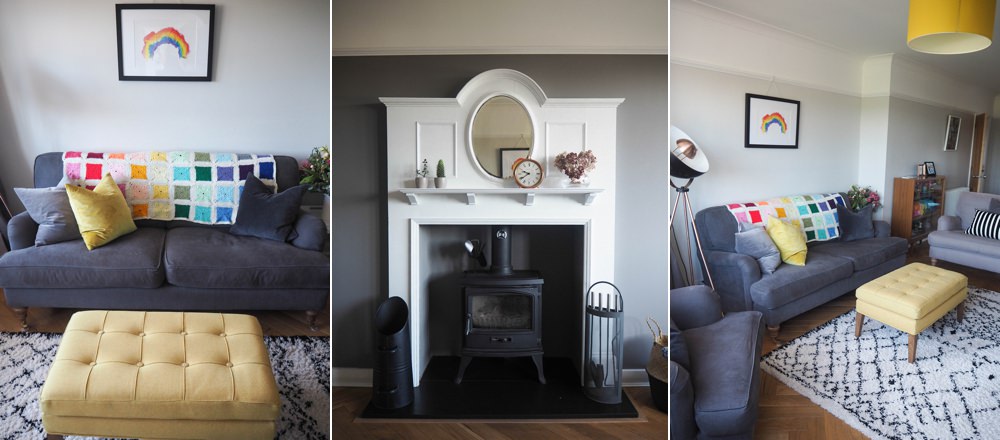
It’s been a fair while since I did any interiors blogging, but that’s all about to change as I really want to bring back one of my passions to WWW. We moved into our 1930s art deco semi-detached house many years ago now, I can’t believe we’ve lived here now for so long! So first up I am going to share our 1930s living room renovation.
The first space in the house we decided to renovate was the living room, mainly as it’s one of the rooms we use the most and one in which we would be welcoming most visitors into.
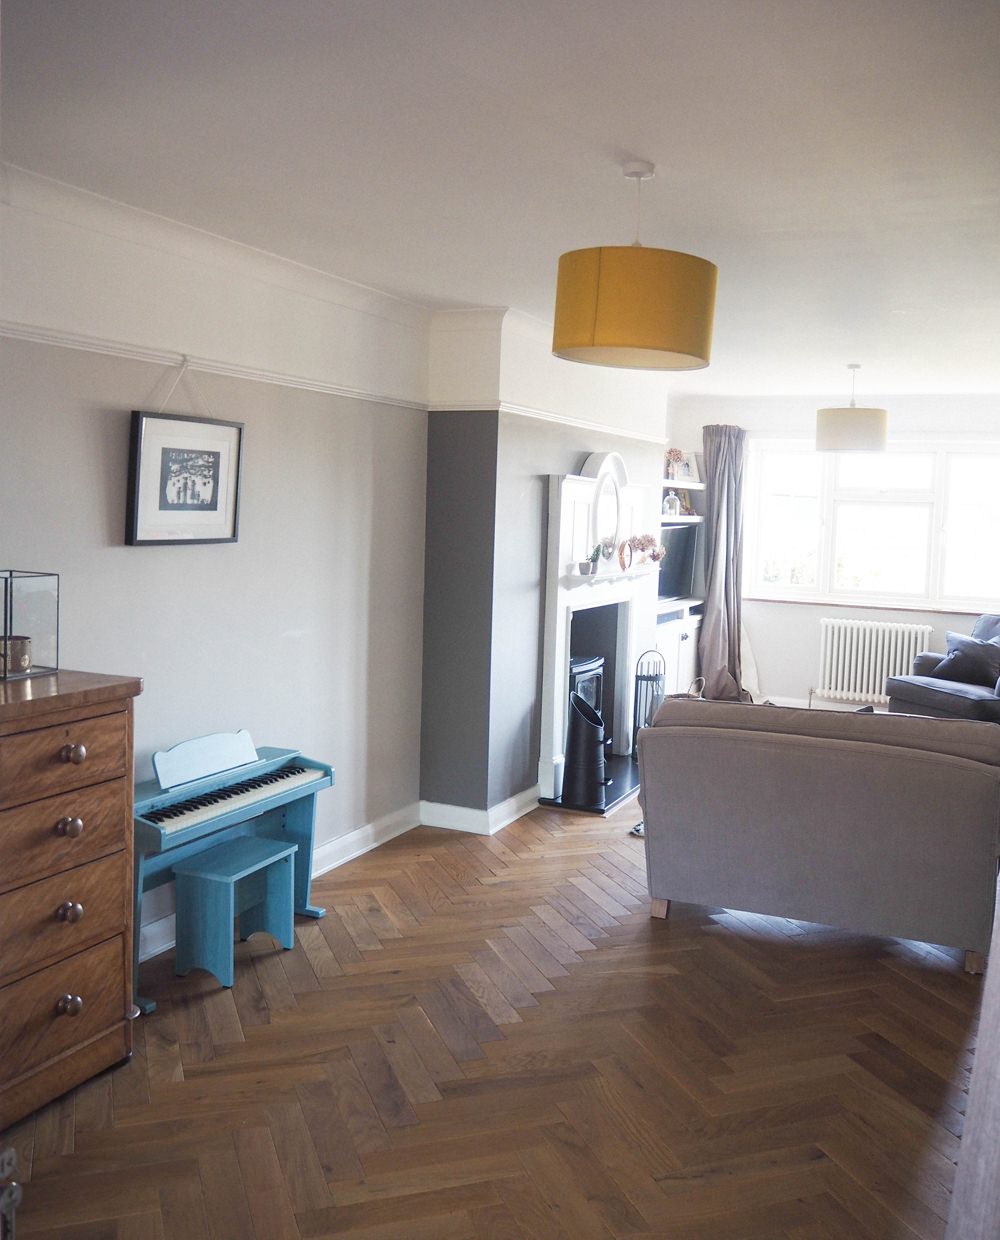
The living room was originally a separate living/dining room and has been knocked through at some point, with one of the doorways moved also. We did dabble with the idea of restoring the wall and putting the layout back to its historical roots, however, after living in the space we decided not to.
It gives a lovely open feel with a nice flow and space. I have sometimes thought that since that we’ve made the wrong choice, mainly whilst we draw up plans for our kitchen extension, but alas it’s too late now and we move forward.
For the living room, I had an extensive Pinterest board set up before we moved in and lots of interior inspiration on Instagram.
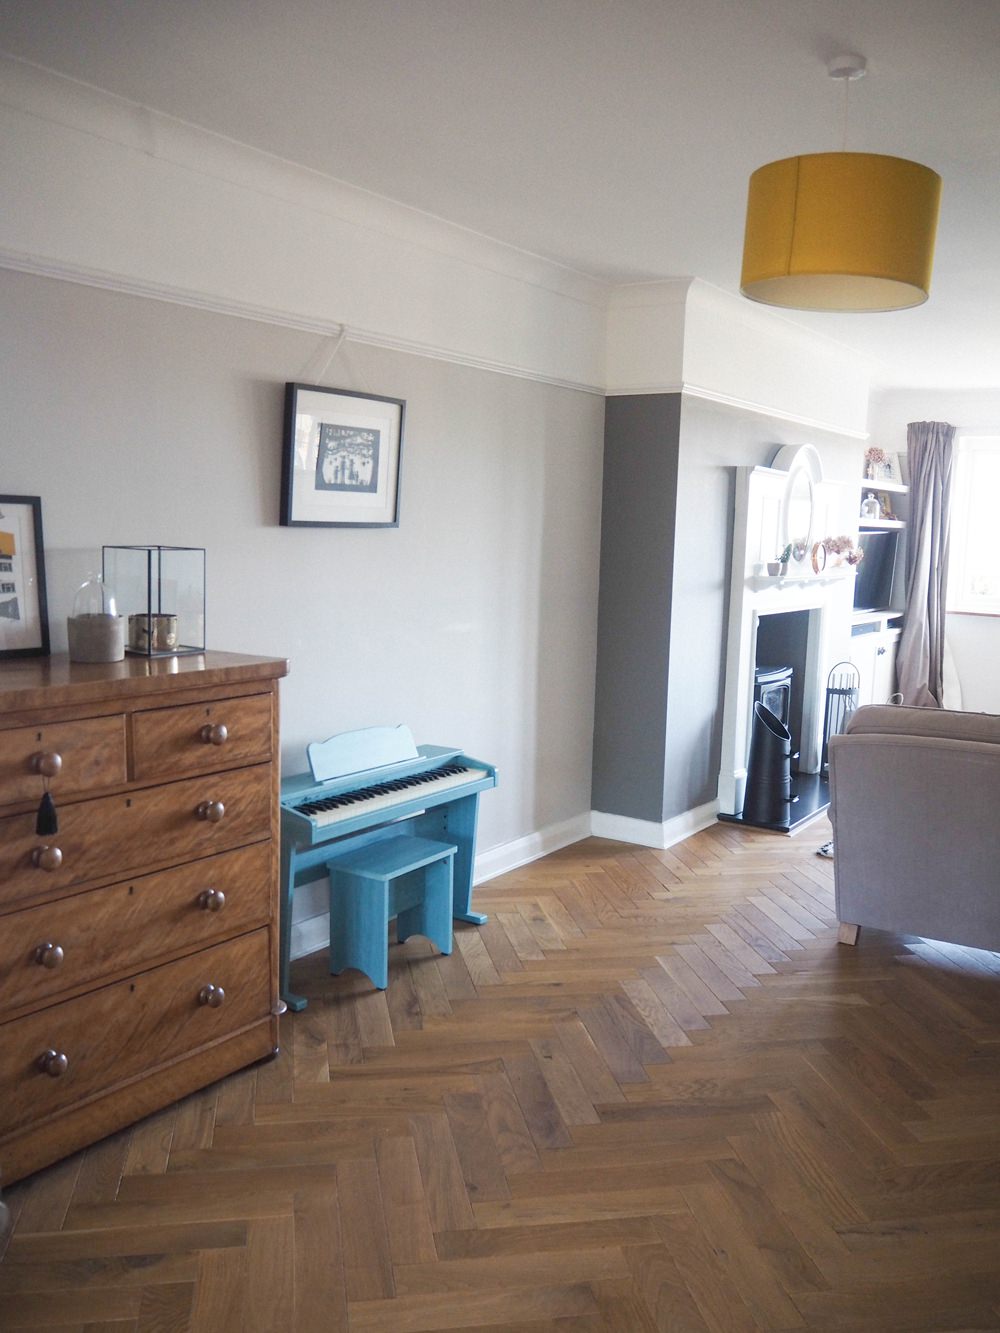
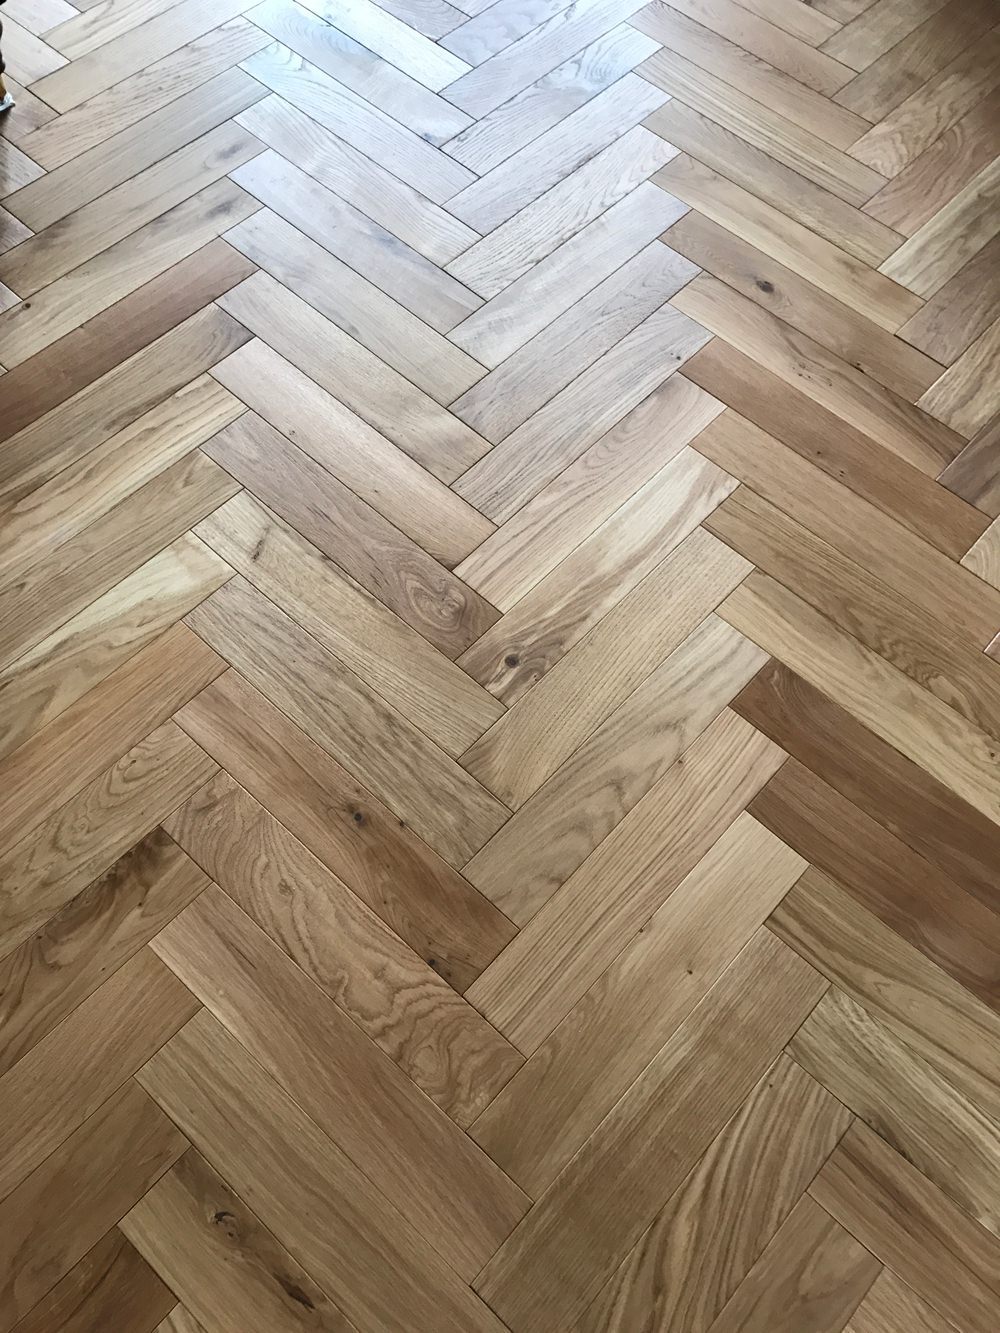
In our old house, we had an open fire, but we dreamed of a log burner, which was one of our must-haves. Another coveted element on my list was a herringbone parquet floor and traditional style radiators. I really wanted the room to have a traditional, authentic to the era style, yet with a modern and ‘us’ twist to the décor. With neutral paint and then fun pops of colour in the finishings.
I have always found a neutral colour palette more flexible to my changing tastes and décor over the years.
→ This post contains affiliate links, which means I may earn a commission if you make a purchase – at no additional cost to yourself.
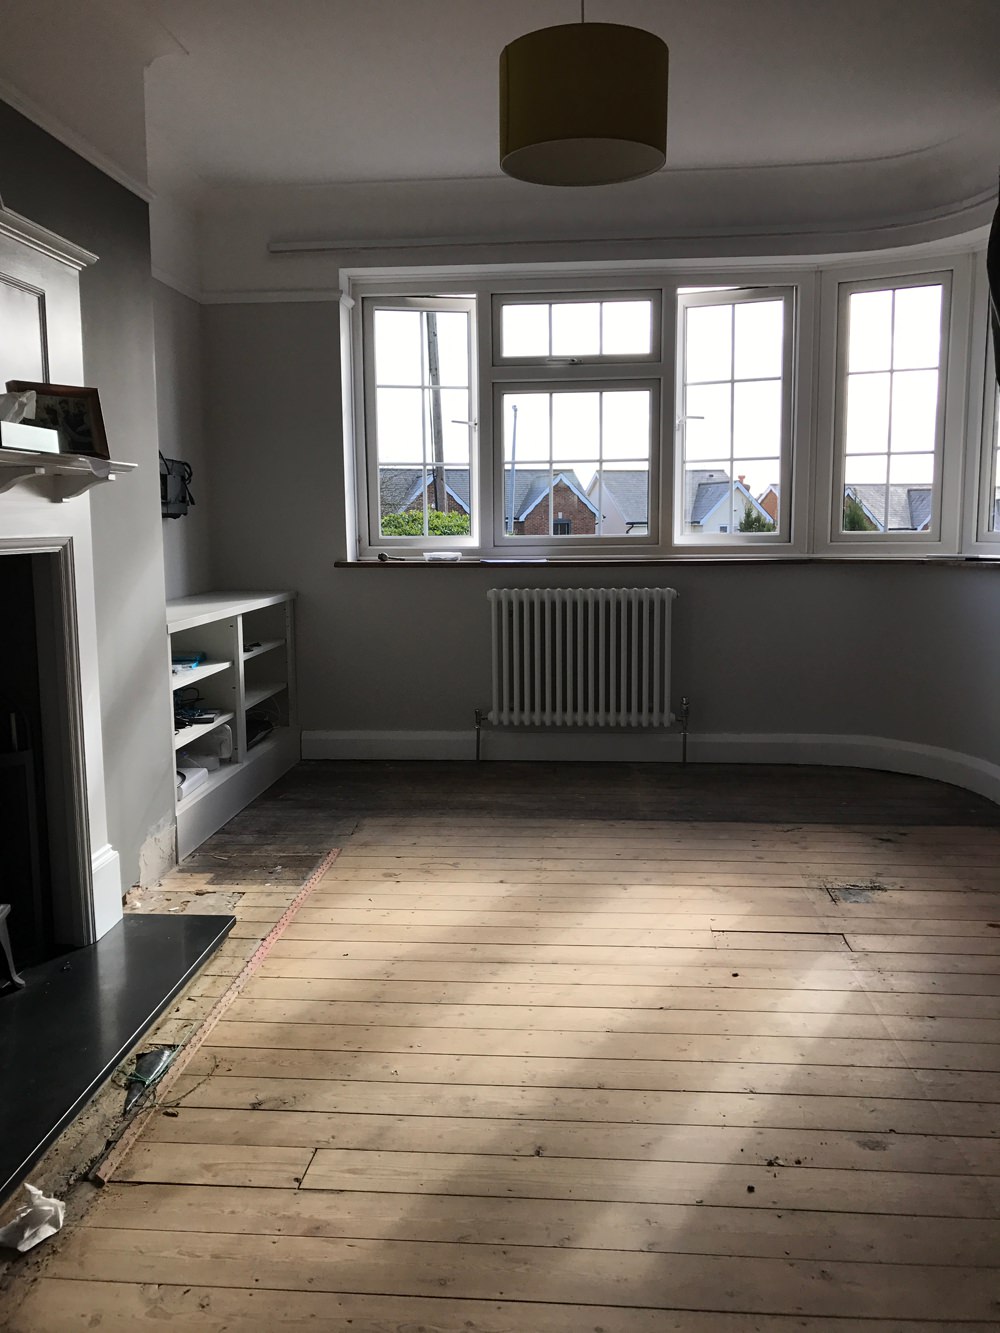
In brief, our builder moved our fireplace opening, we had new picture rails and skirting installed, a new internal door and parquet flooring laid by a fitter.
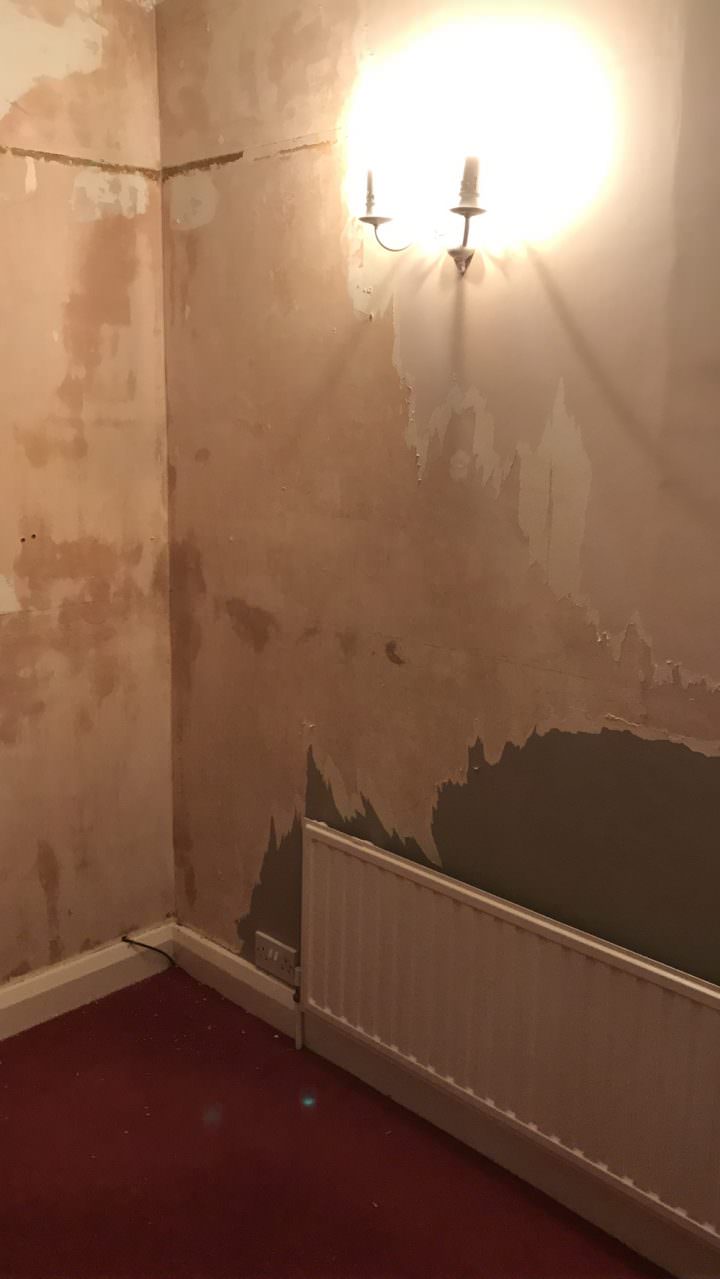
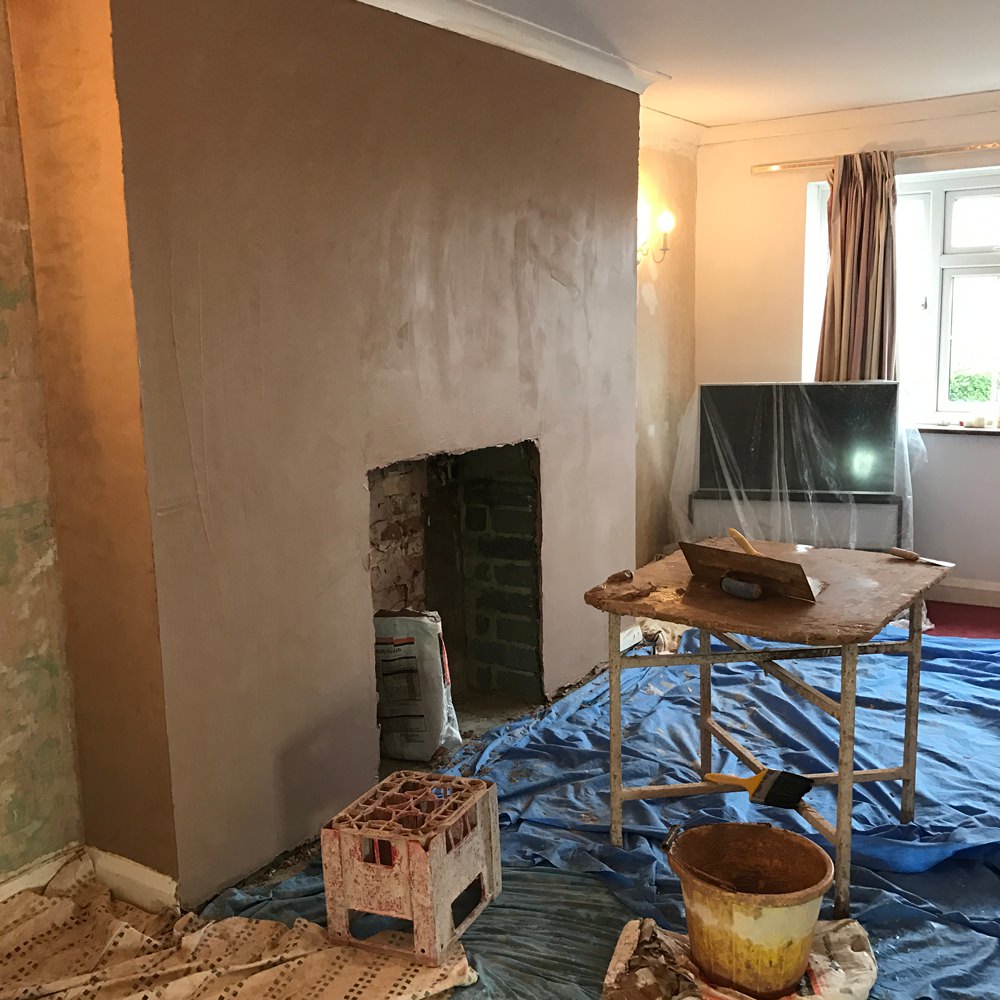
We try and do most jobs ourselves where we can, so lots of fiddly bits and prep were done by us. Once we had stripped all of the wallpaper, we re-plastered the whole of the room, then we decorated the walls in Farrow and Ball’s Ammonite below the picture rail, with Mole’s Breath on the feature wall.
Electricians changed all the sockets and we moved the electrics for the TV set up to the corner of the room. We also installed a fitted cupboard ourselves. Here are some photos of the actual renovation process.
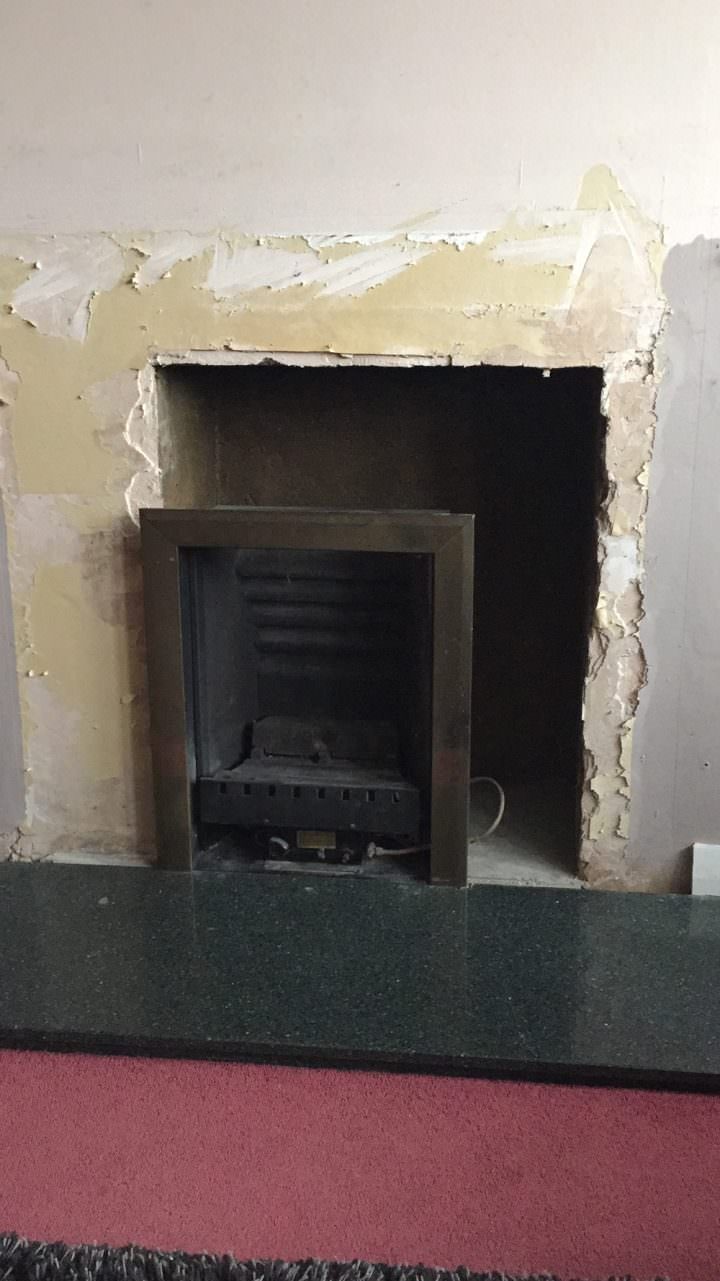
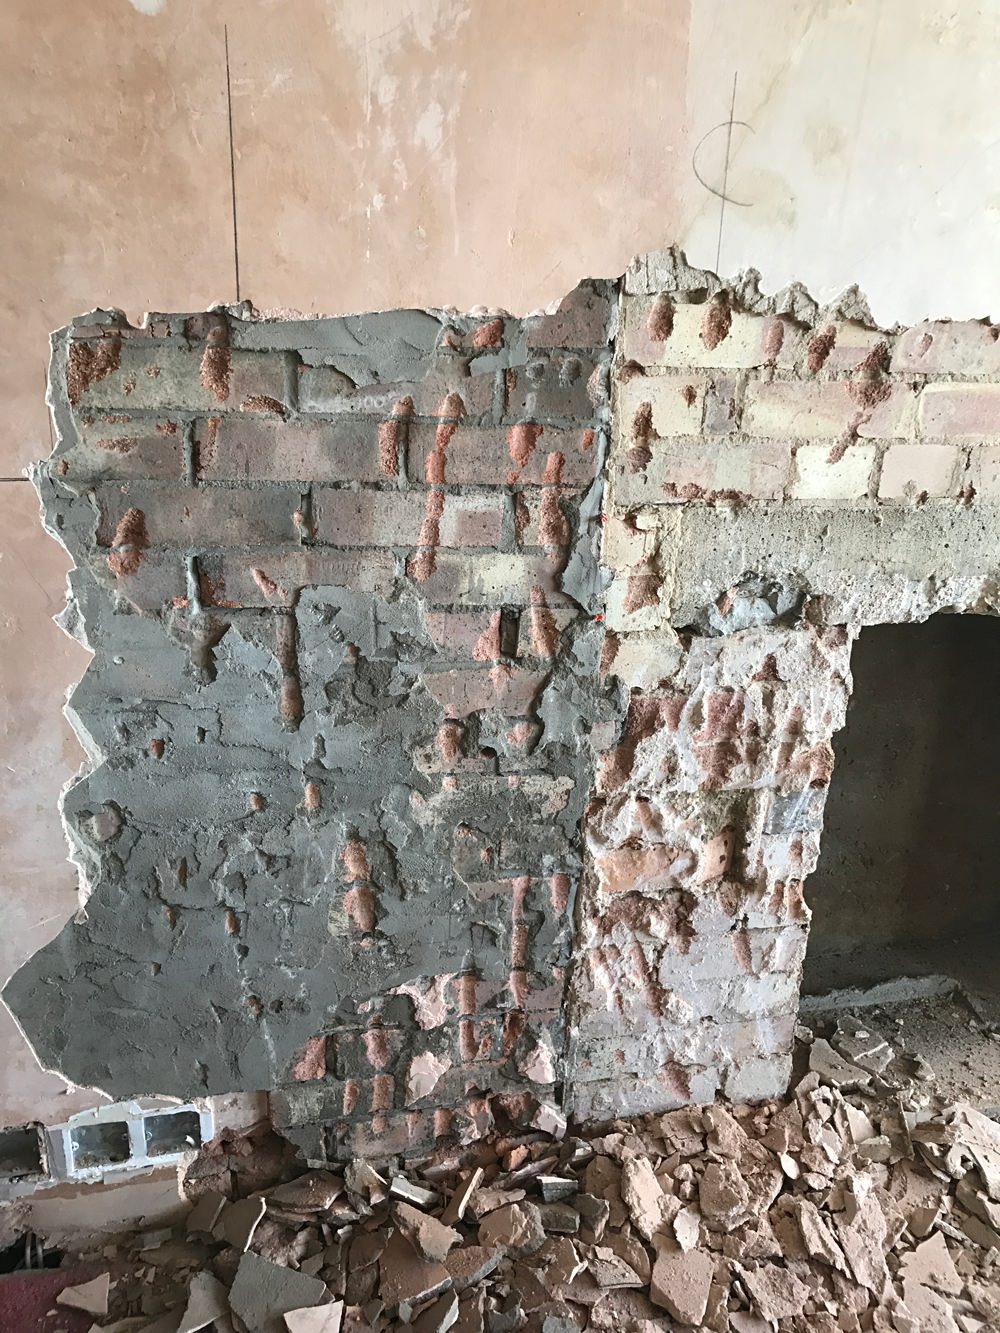
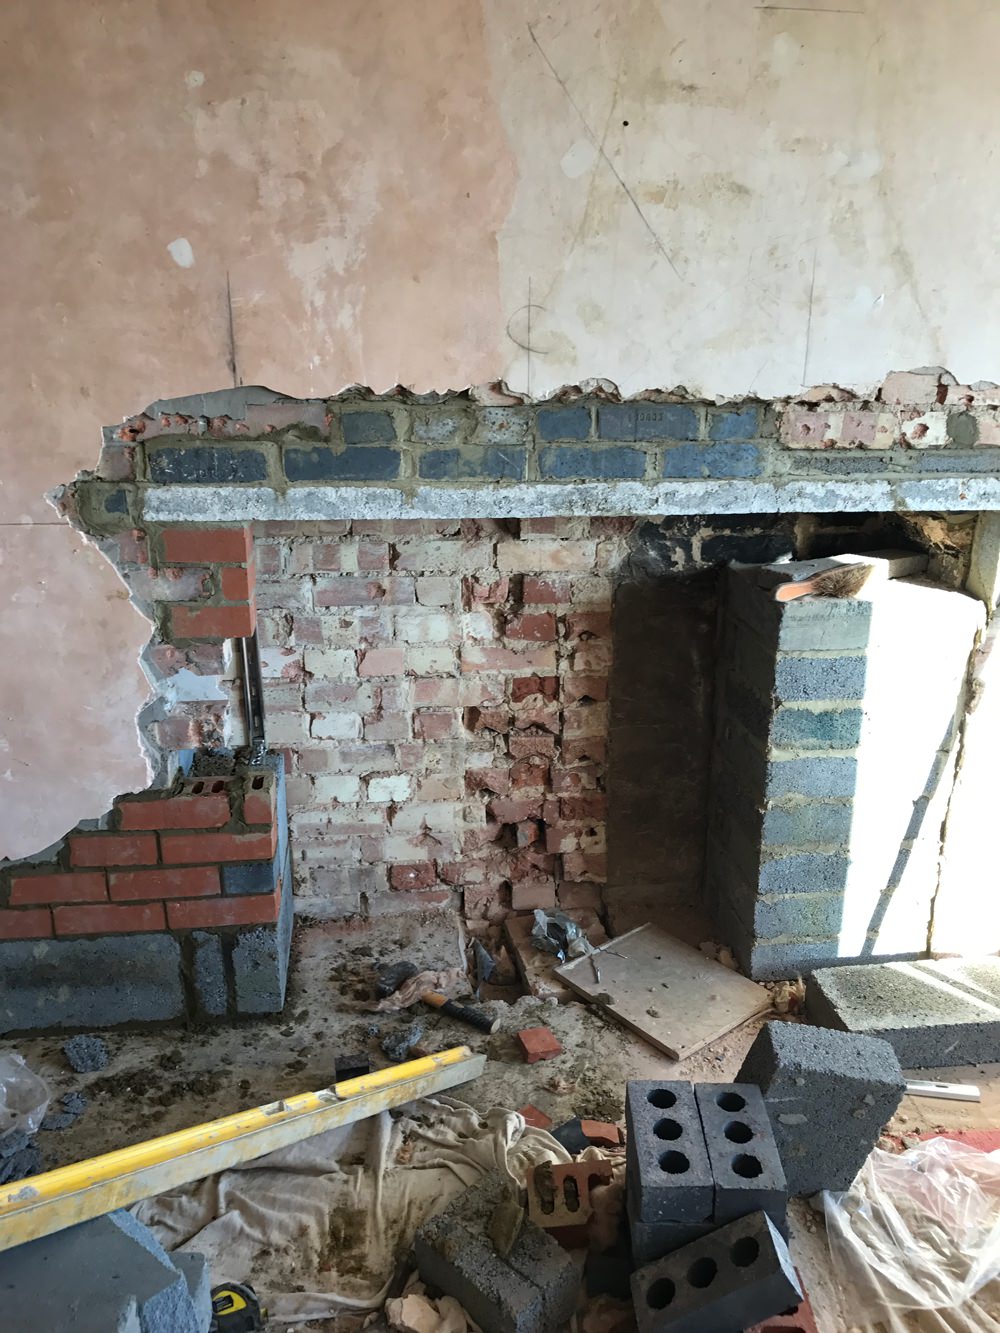

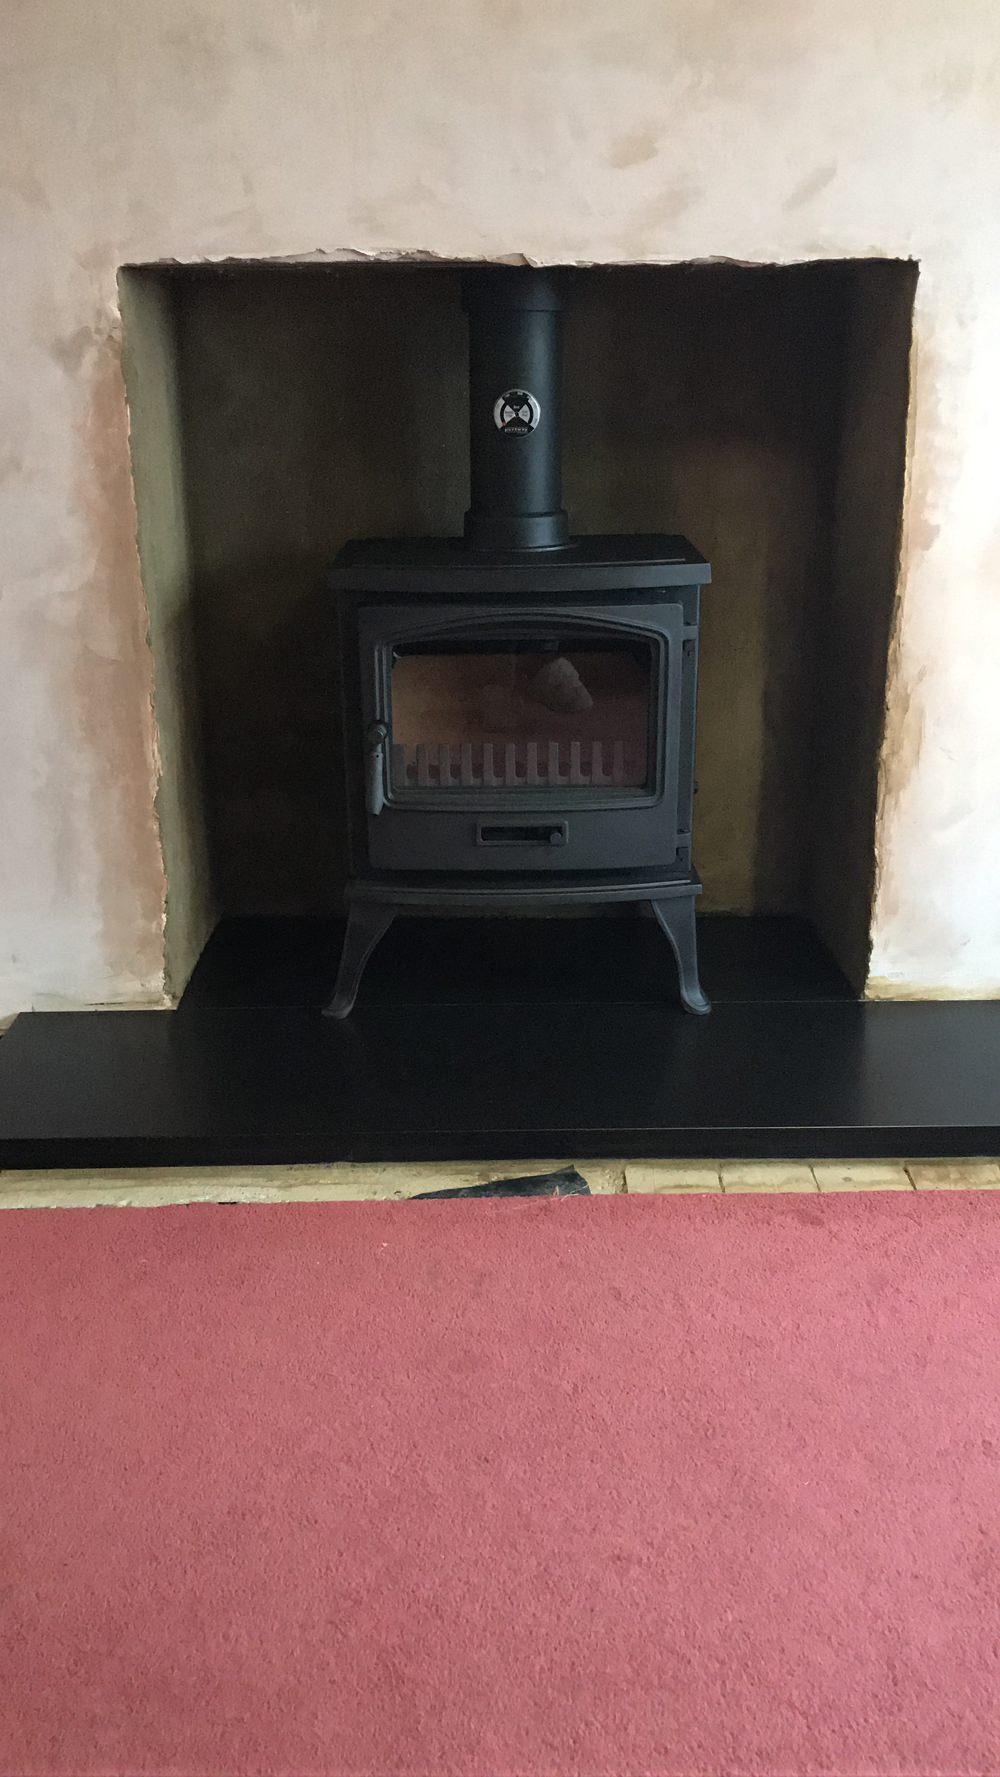
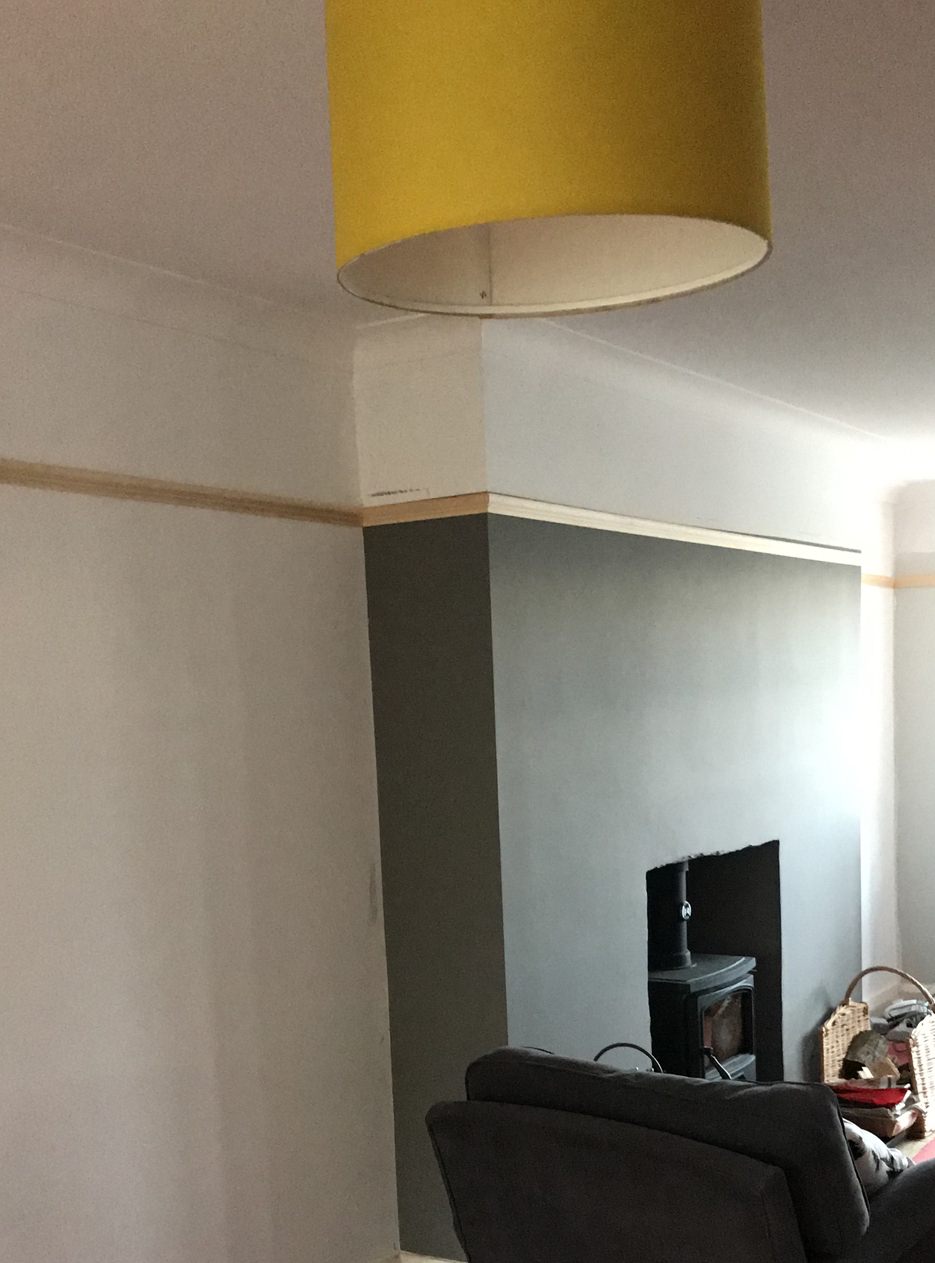
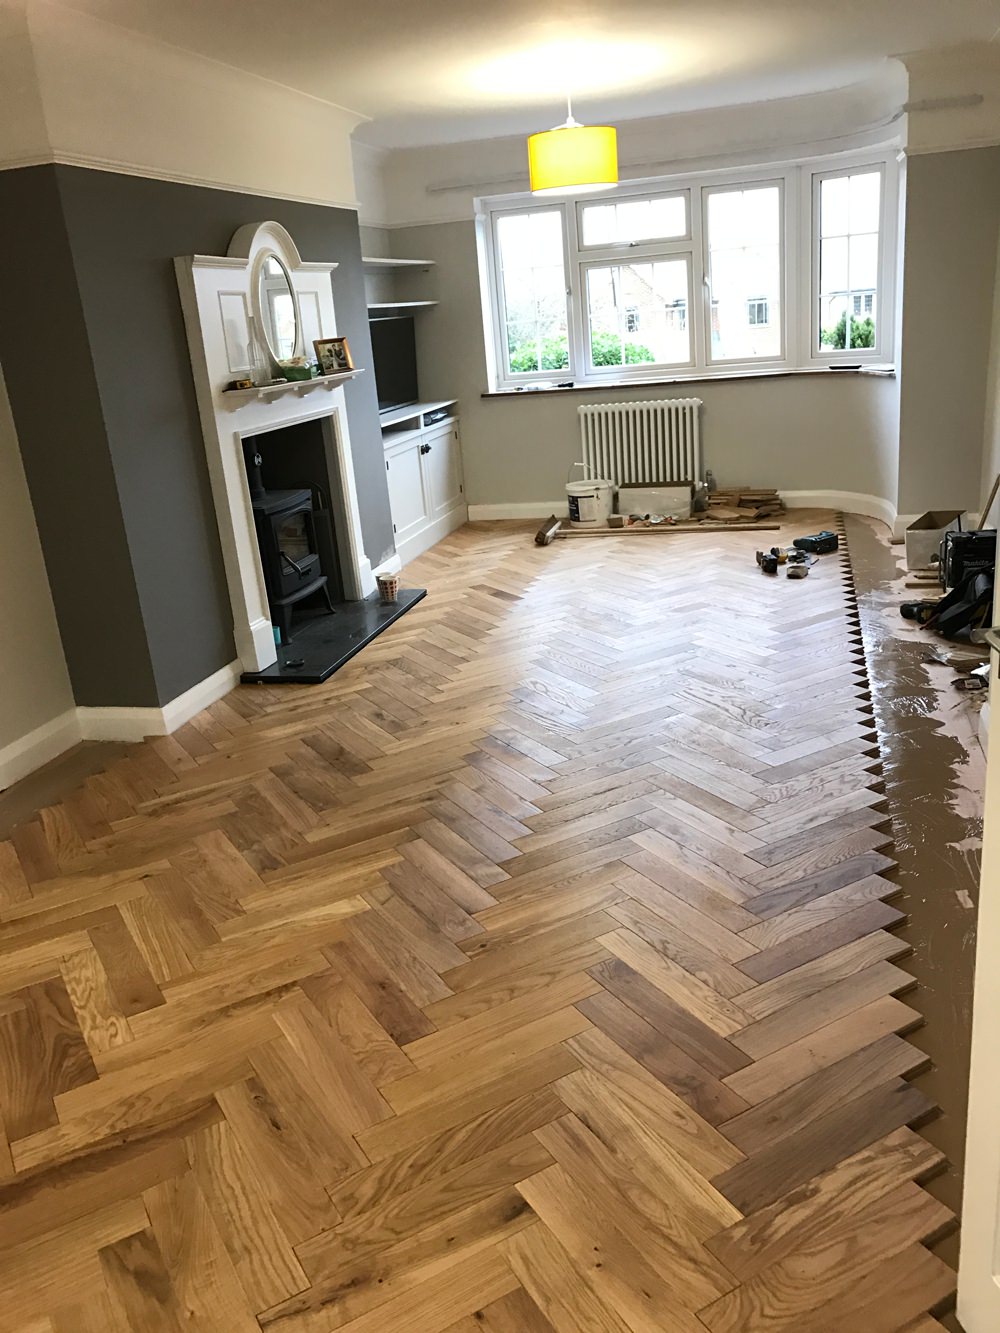
The way the room was laid out, the fireplace that was there was offset to the side of the feature wall and we made the more expensive decision to move it across slightly to be central to the wall. At the time it was a real pain to do, very messy, and at a higher cost, but I just know had we had left it, it would have annoyed us forever. I love a spot of symmetry!
We asked our builder to move the fireplace opening for us, we then chose our dream log burner (who knew there were so many to choose from!) to be installed. We chose black granite for the hearth, to be neutral and low maintenance in terms of cleaning, after all a fire can create a fair amount of dirt.
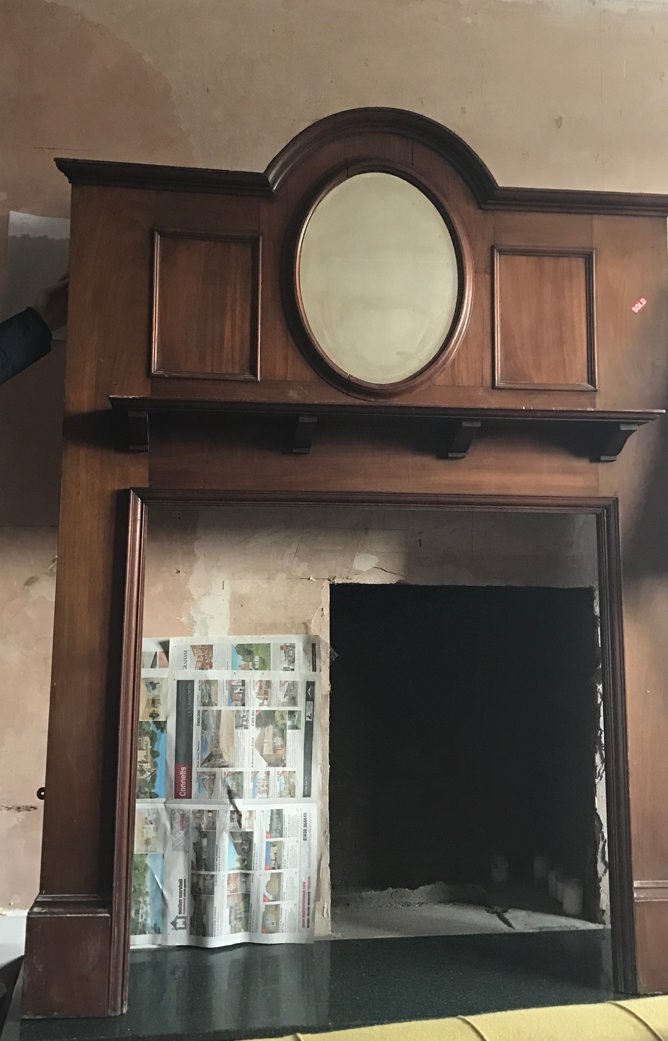
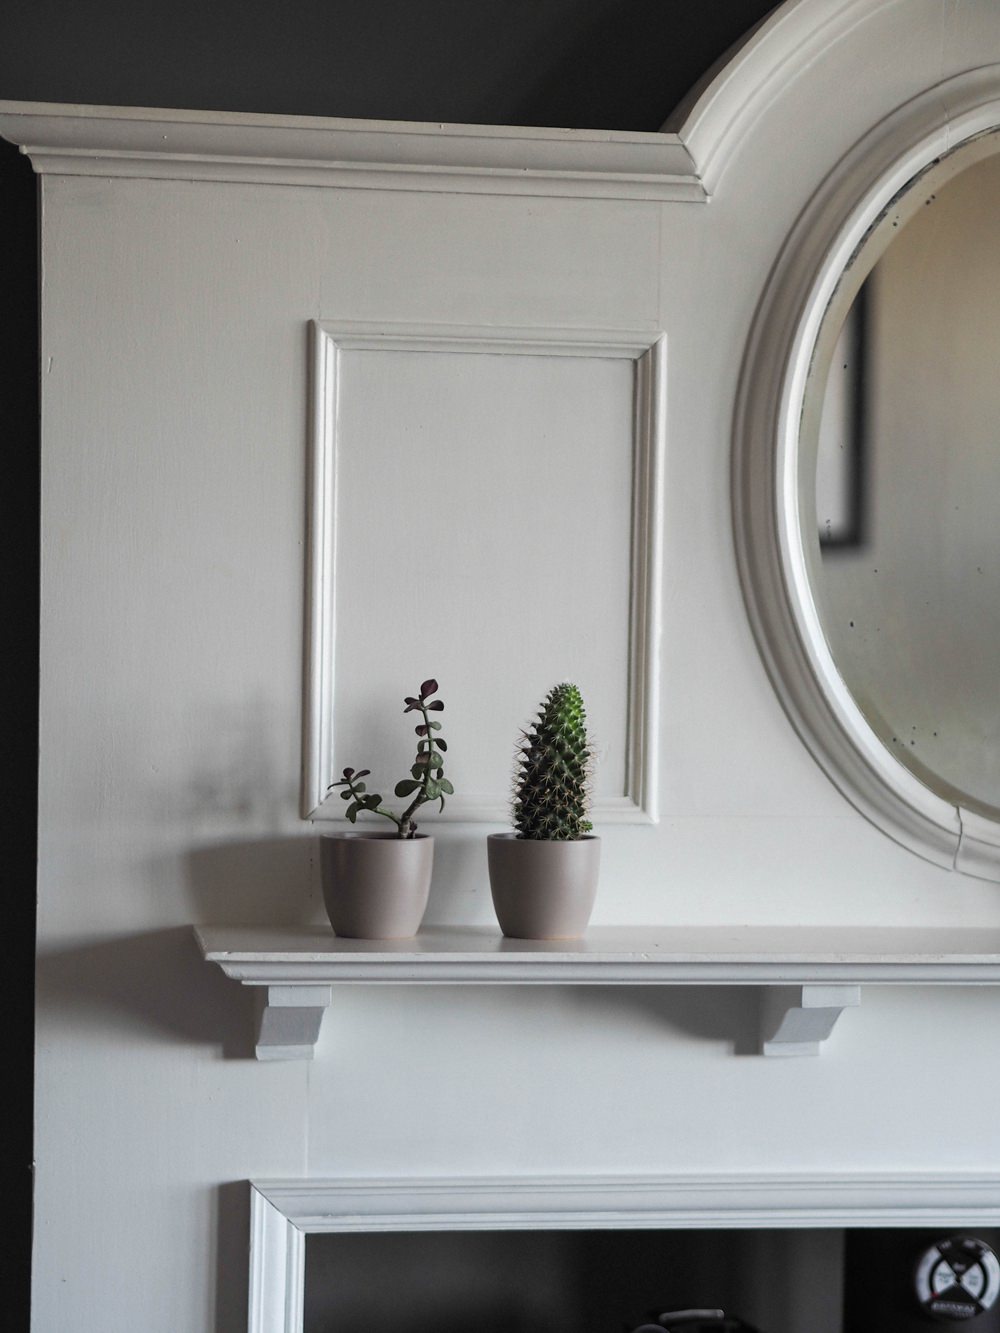
I then searched high and low for our fireplace surround. I really wanted something antique, with an art deco vibe, ideally with an oval mirror to emulate the half bay window we have, which is one of my fave features of the house.
I struck lucky on eBay with our lovely wooden surround, which we renovated and painted white. It made for the perfect centrepiece for the room and years later I still love it. It looks like it’s always been there.
We painted the fireplace wall in a statement cosy colour (Farrow & Ball Mole’s Breath) and painted behind the log burner in the same shade.

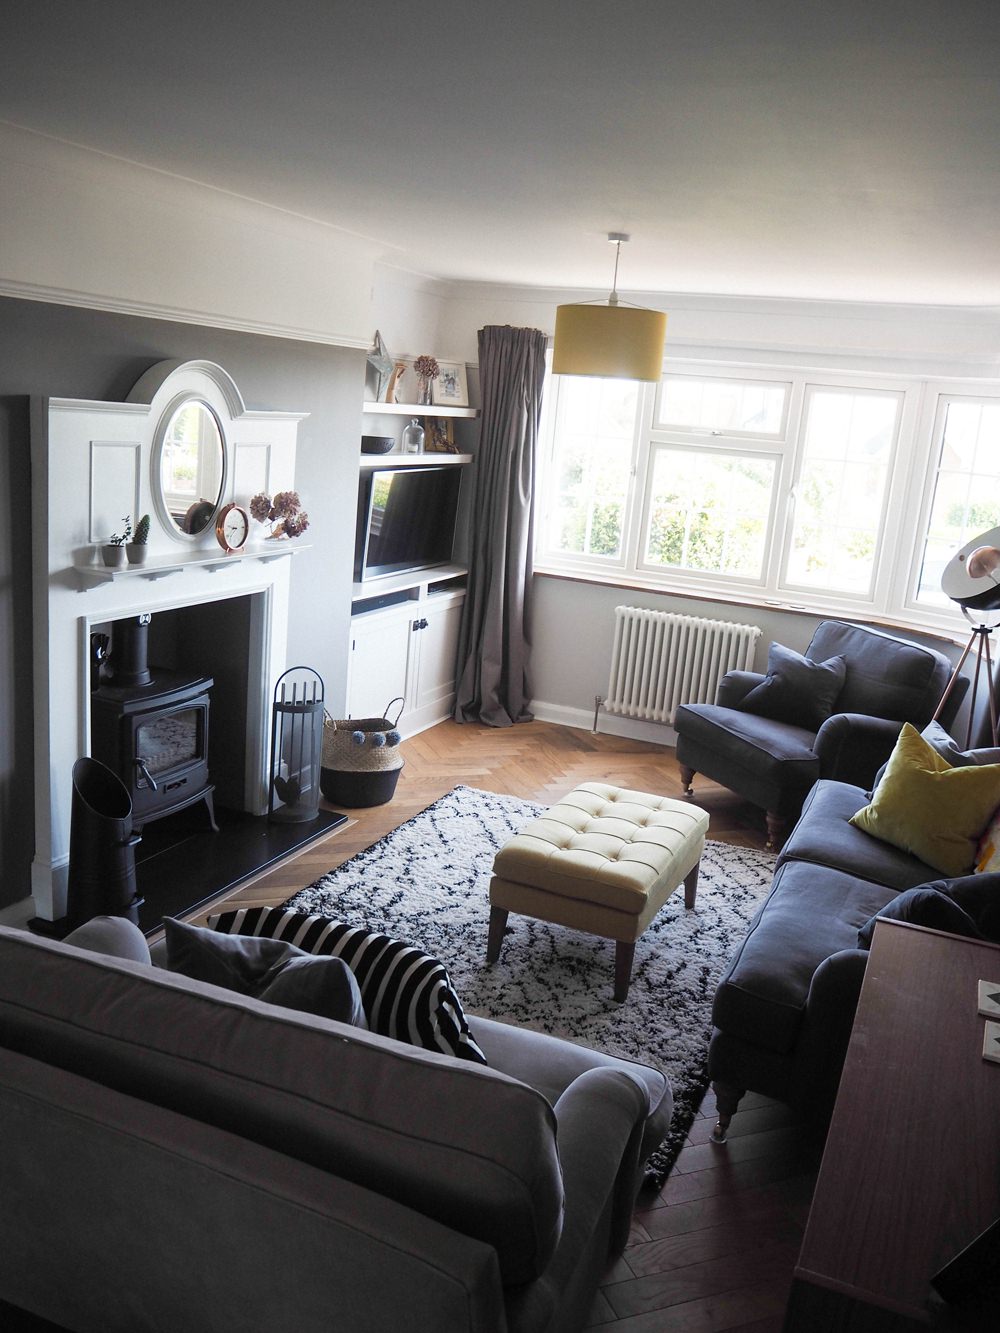
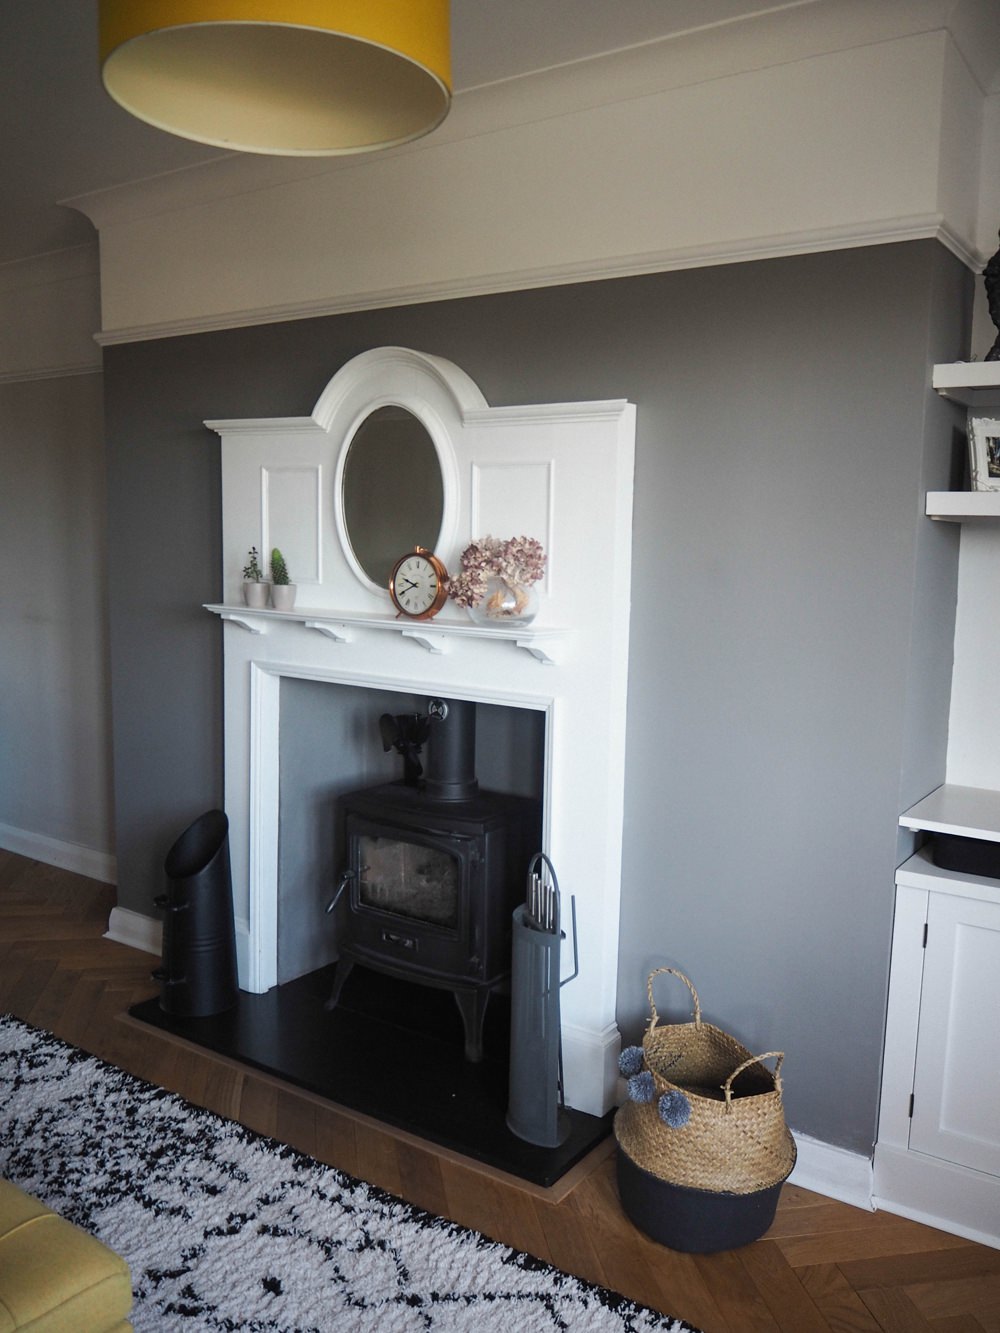

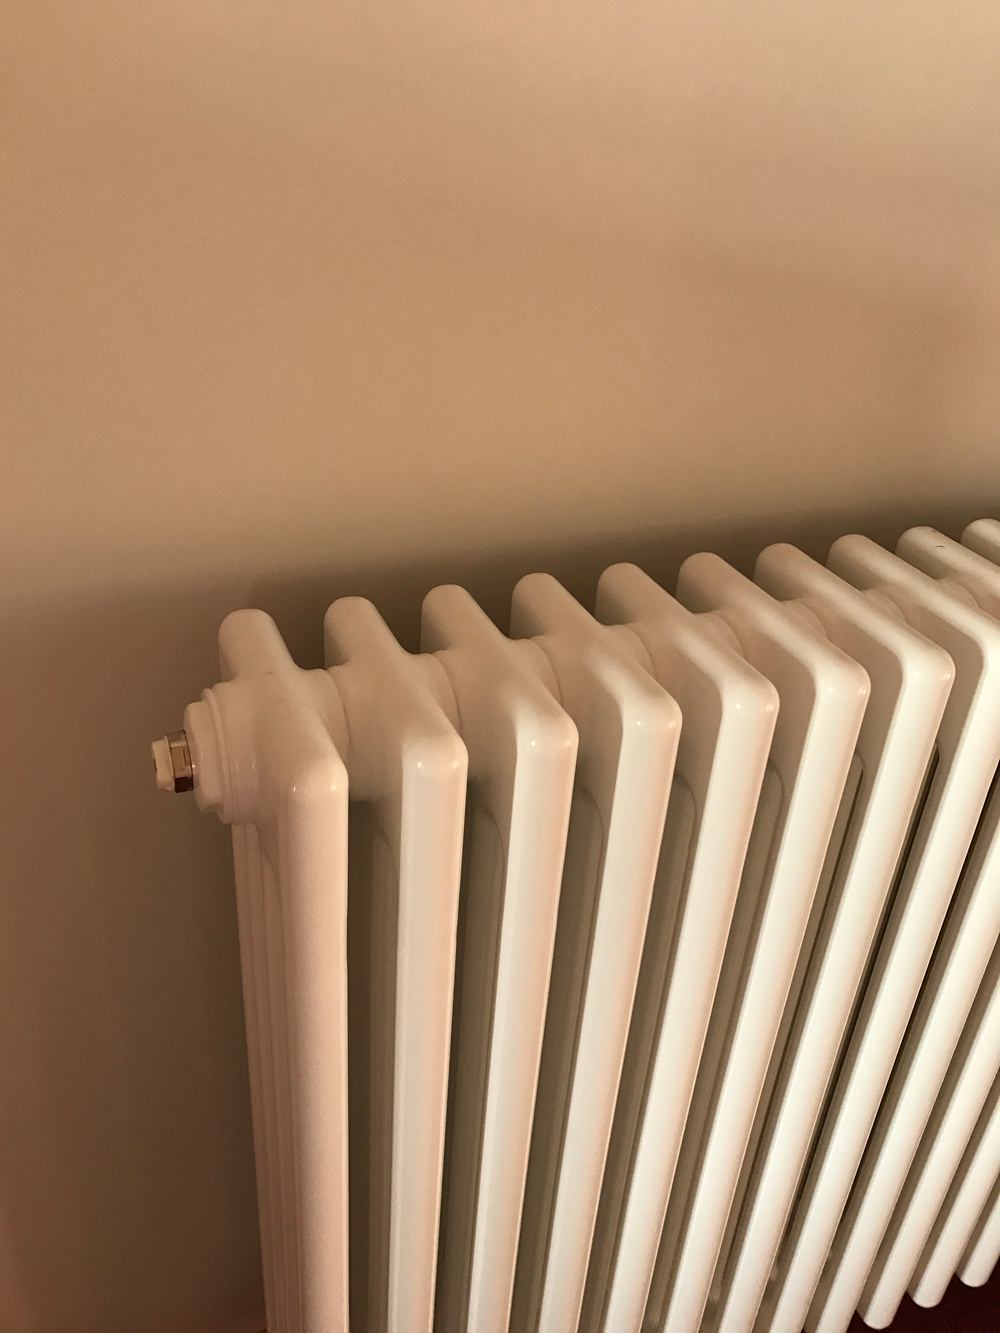
Throughout the house we have installed new column radiators which have a period feel, we went for the Acova range, as they are good value compared to original restored radiators. They really enhance each room we have placed them in and I was far too excited when the living room radiators were installed. I never knew I would get so excited about plumbing I can tell you!
👉 More column radiator stockists
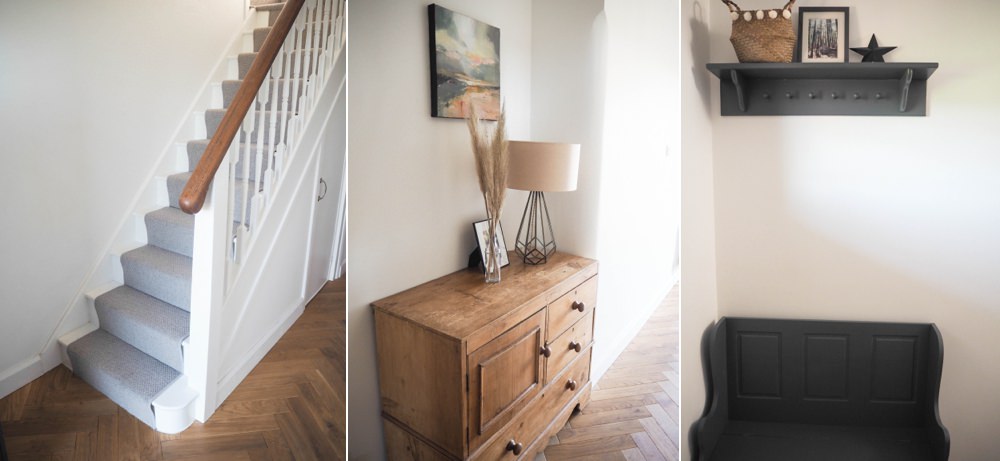
For the living room, we decided to remove the dado rails (and a lot of wallpaper!) but add back in the picture rails which were once there. This was a bit of an investment, which I admit we haven’t added to the rest of the house, but I am so pleased we did so in here. It really finishes off the space and I love that we then have two paint colours on the walls to enhance further. Plus it’s so easy to hang and move artwork around.

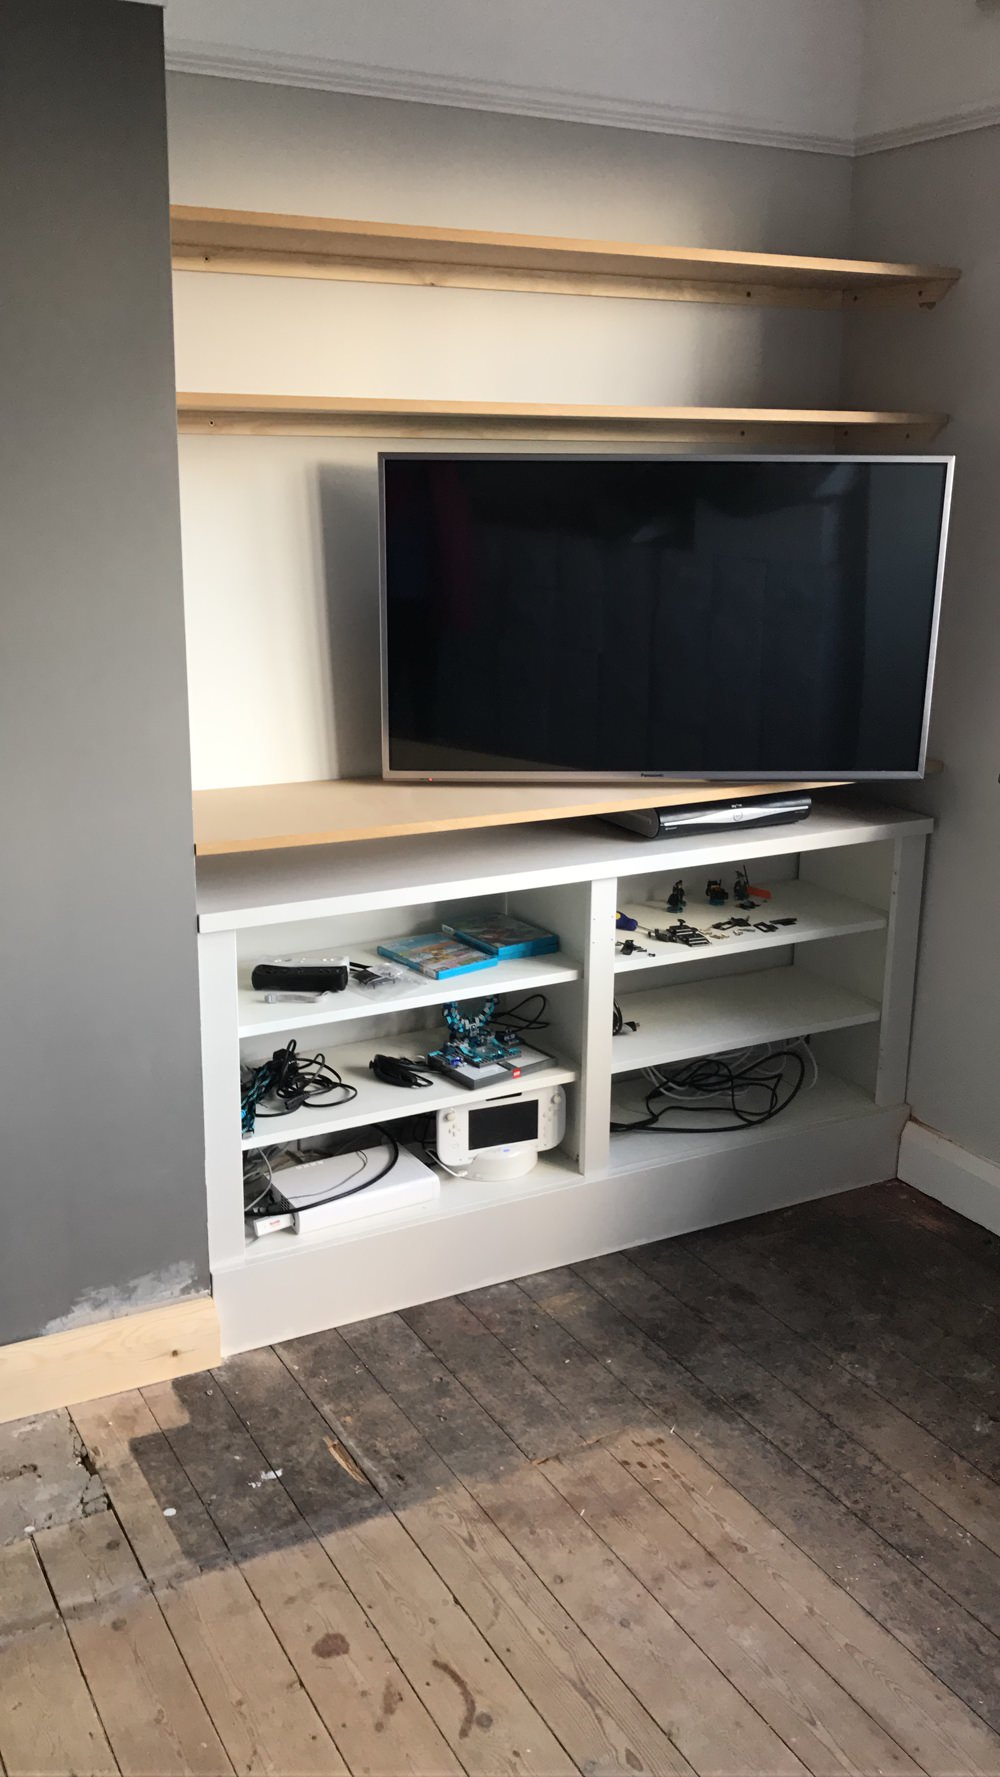
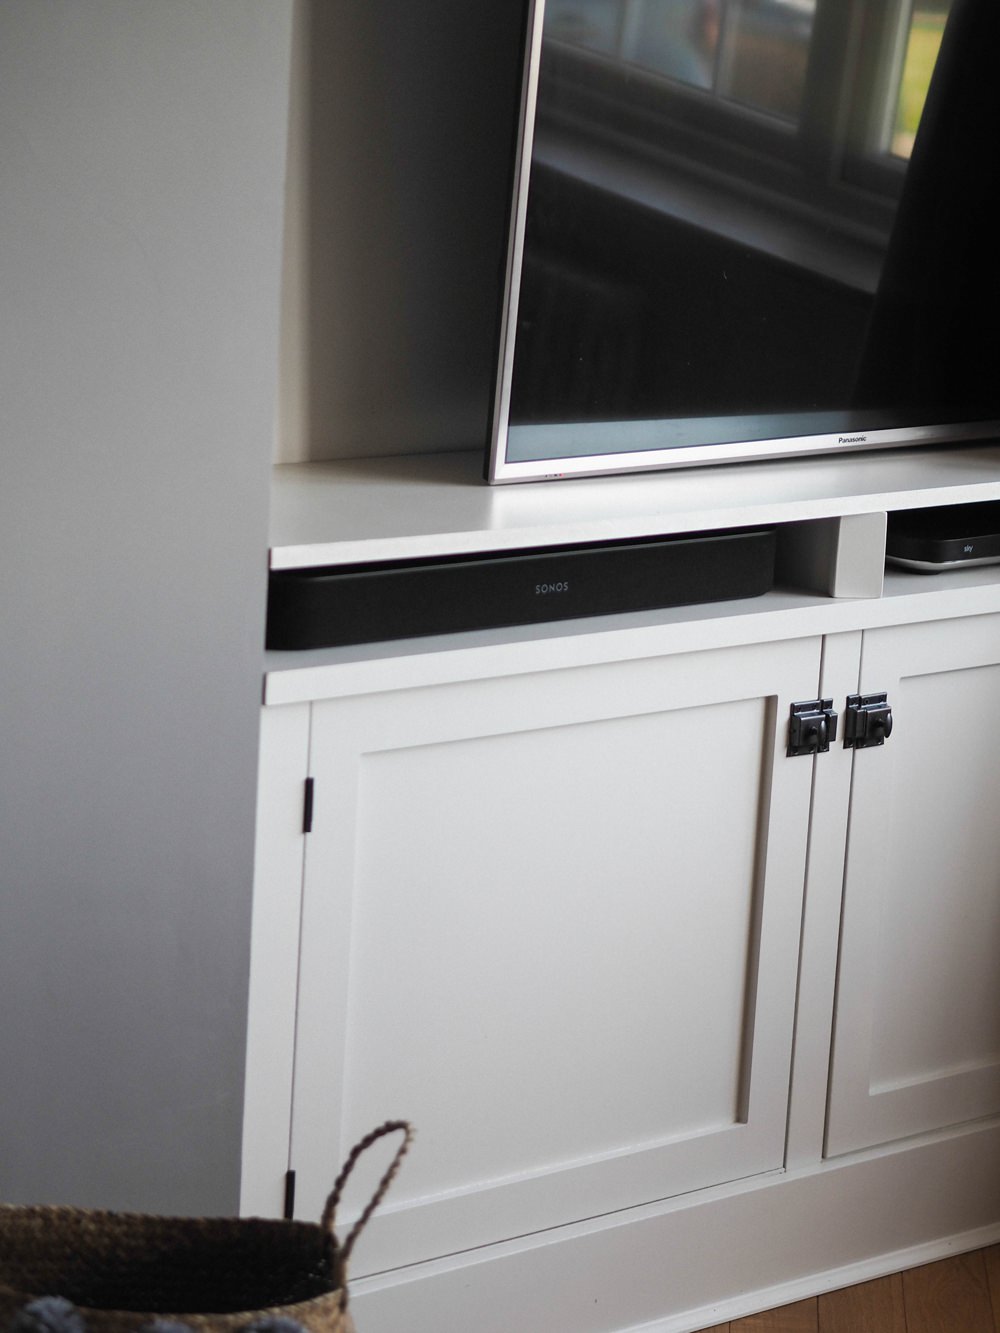
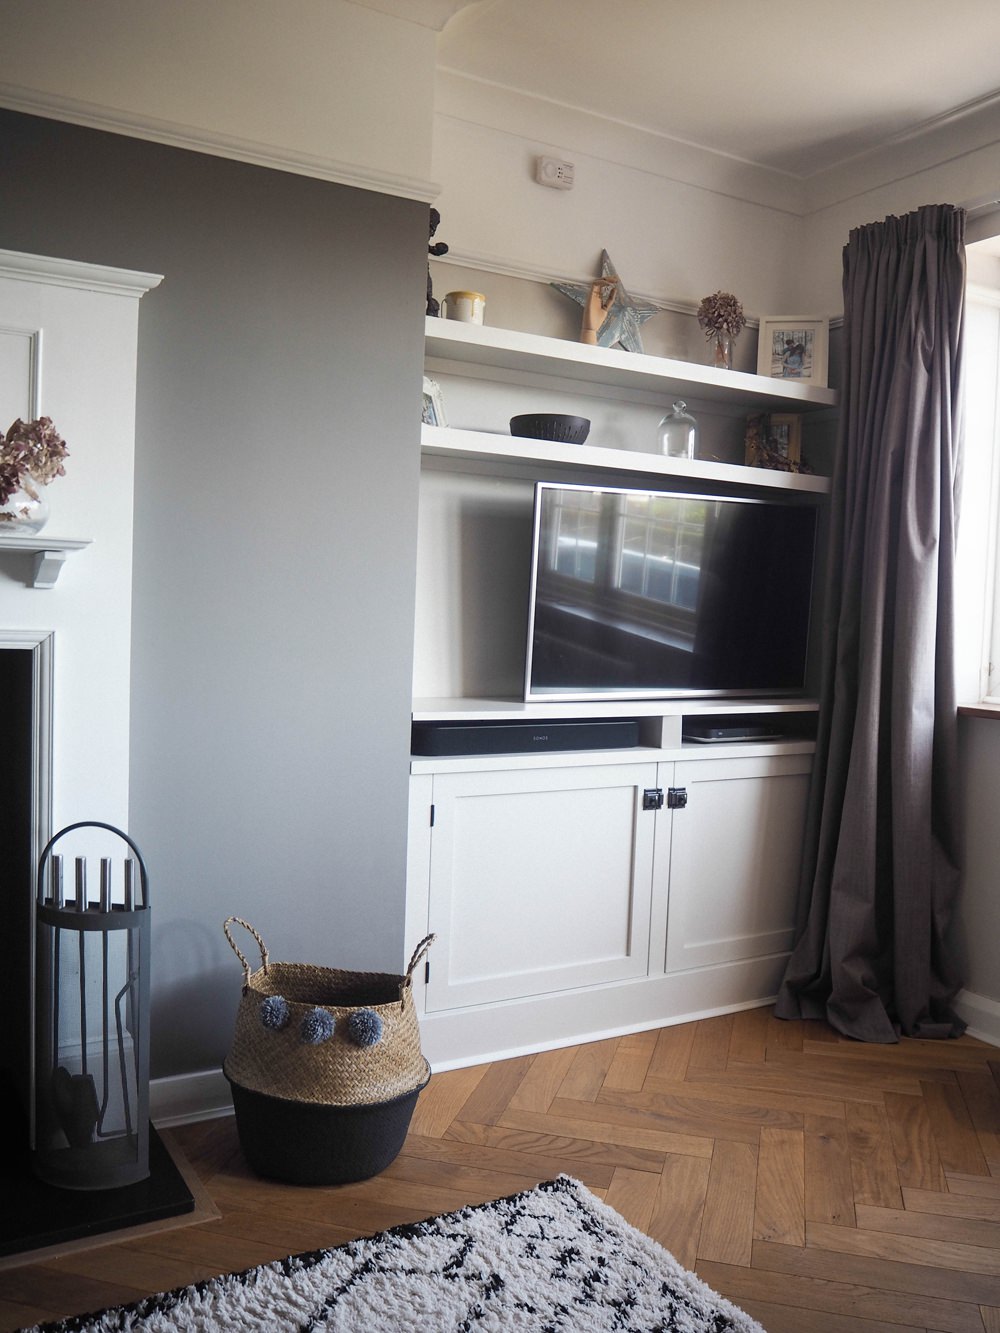
After moving the TV set up into the corner of the room, I really wanted a built-in cupboard as opposed to a TV stand or unit. After much searching, we designed and bought a built-in cupboard from Jali, which we put together himself from flat pack and painted in Farrow and Ball Ammonite to match the walls seamlessly. Our carpenters then fitted the floating shelves above.
Our electrician chased out a cable run for our TV cables and the various electronic cables to be hidden and we installed a TV mount onto the wall, which was sourced I believe from Amazon.
It’s great actually as it comes really far out when we use it, but folds perfectly back into the space when it’s not needed. We ran a small shelf above the cupboard in which we have our Sky Q box and Sonos soundbar, it kind of makes it invisible which I love, but is still practical to use.
The cupboard itself gives loads of storage for DVDs and computer games too. Win-win.

Now, the flooring was the one thing we really struggled with. We knew it was going to be pricey, however, the more we looked into it and got quotes the pricer it seemed to be getting.
In the past herringbone parquet was harder to come by and we weren’t confident to buy antique parquet and install ourselves. So we opted for a new parquet floor tile from Direct Wood Flooring and were lucky enough to find a local fitter.
It was great as it was all ready to go, it needed installation, but no sanding or sealing. We loved it from the get-go and it still looks great now.
📌 Other Places To Buy Parquet/Herringbone Flooring
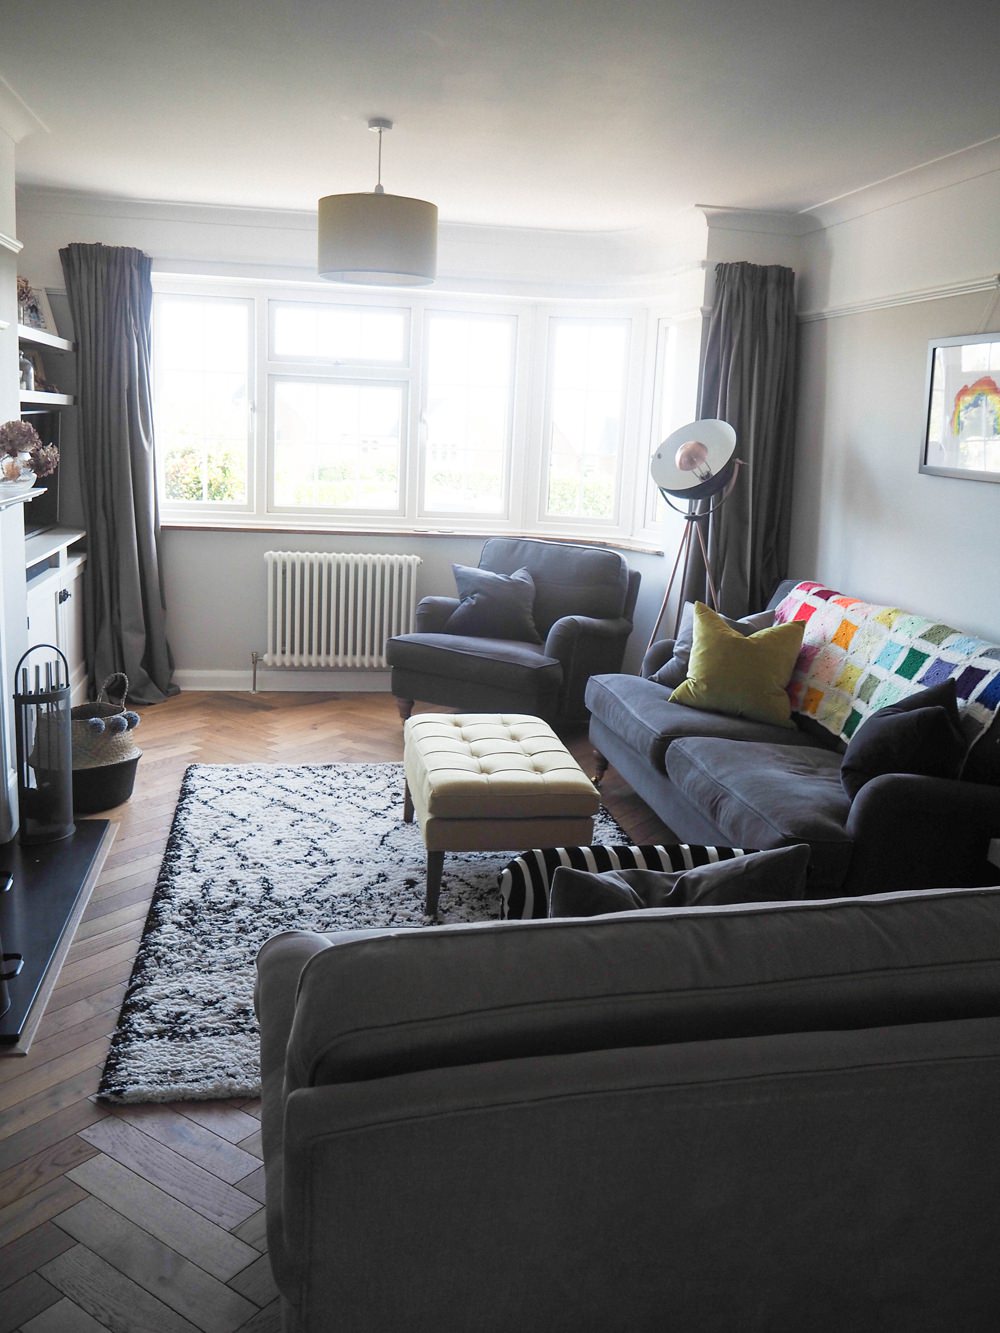
Another element of the renovation I was surprised to give me much stress was our curtains! Having a half bay window meant it seemed near impossible to find a curtain pole which wasn’t massively expensive and wide enough curtains.
So I went down the route of a plain white bendy track that blends in with the paint colour and I think we got away with it! For the curtains, as it’s such a large window, I simply bought 2 pairs of curtains from Dunelm, so we have 4 curtains across the window, they are too long, but I quite like the drapey look luckily.
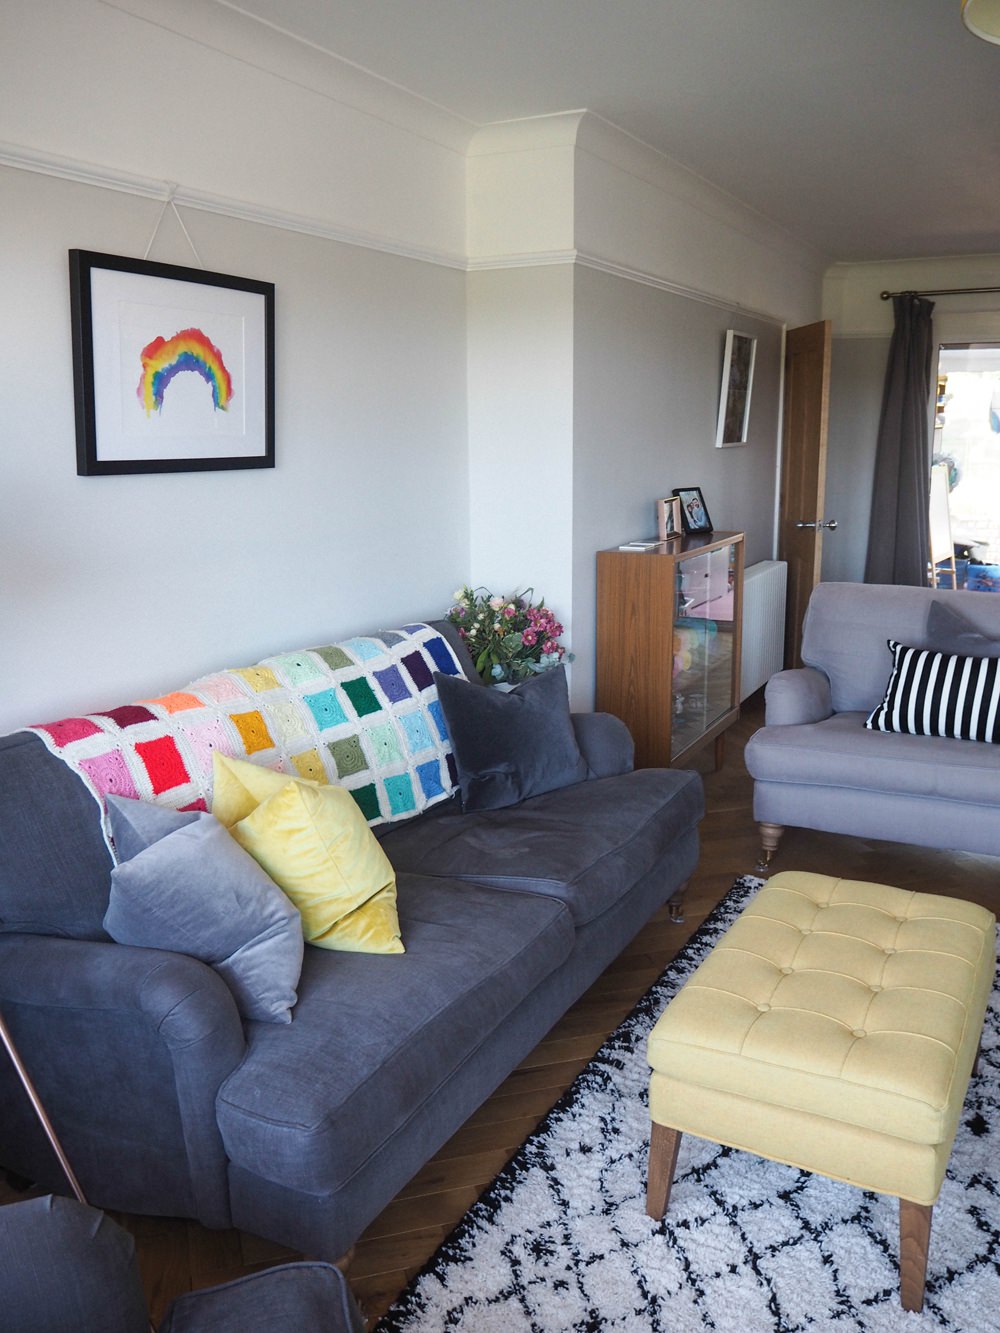
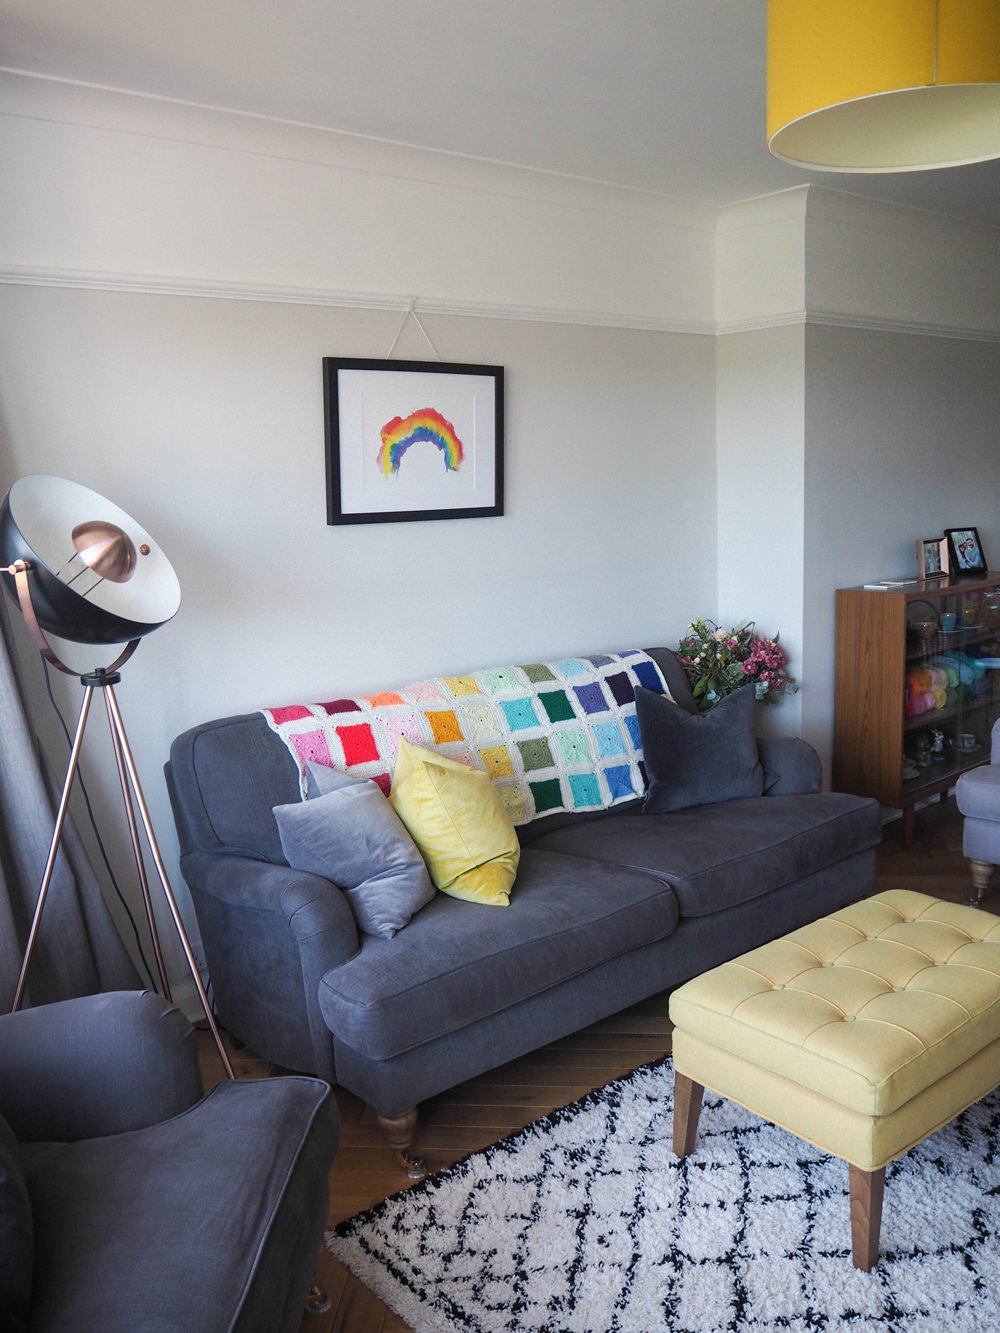
Our sofas were my dream sofa from sofa.com, we went for the bluebell range, with a love seat, armchair and three-seater sofa in three different shades for a mismatched style. We also added a colour pop footstool in a mustard shade which matches the mustard lampshades from IKEA.
We are still really happy with the sofas, we went to the showroom to try them out, they are comfy and with a good plump, the cushions always come back to their best.
Other main furniture in the room includes a retro sideboard that was left at our old house and an antique walnut chest of drawers. I just love an array of eclectic old pieces, mixed with different modern styles too. Over time we’ve added a new rug, the famous La Redoute Afaw Berber Style Rug.
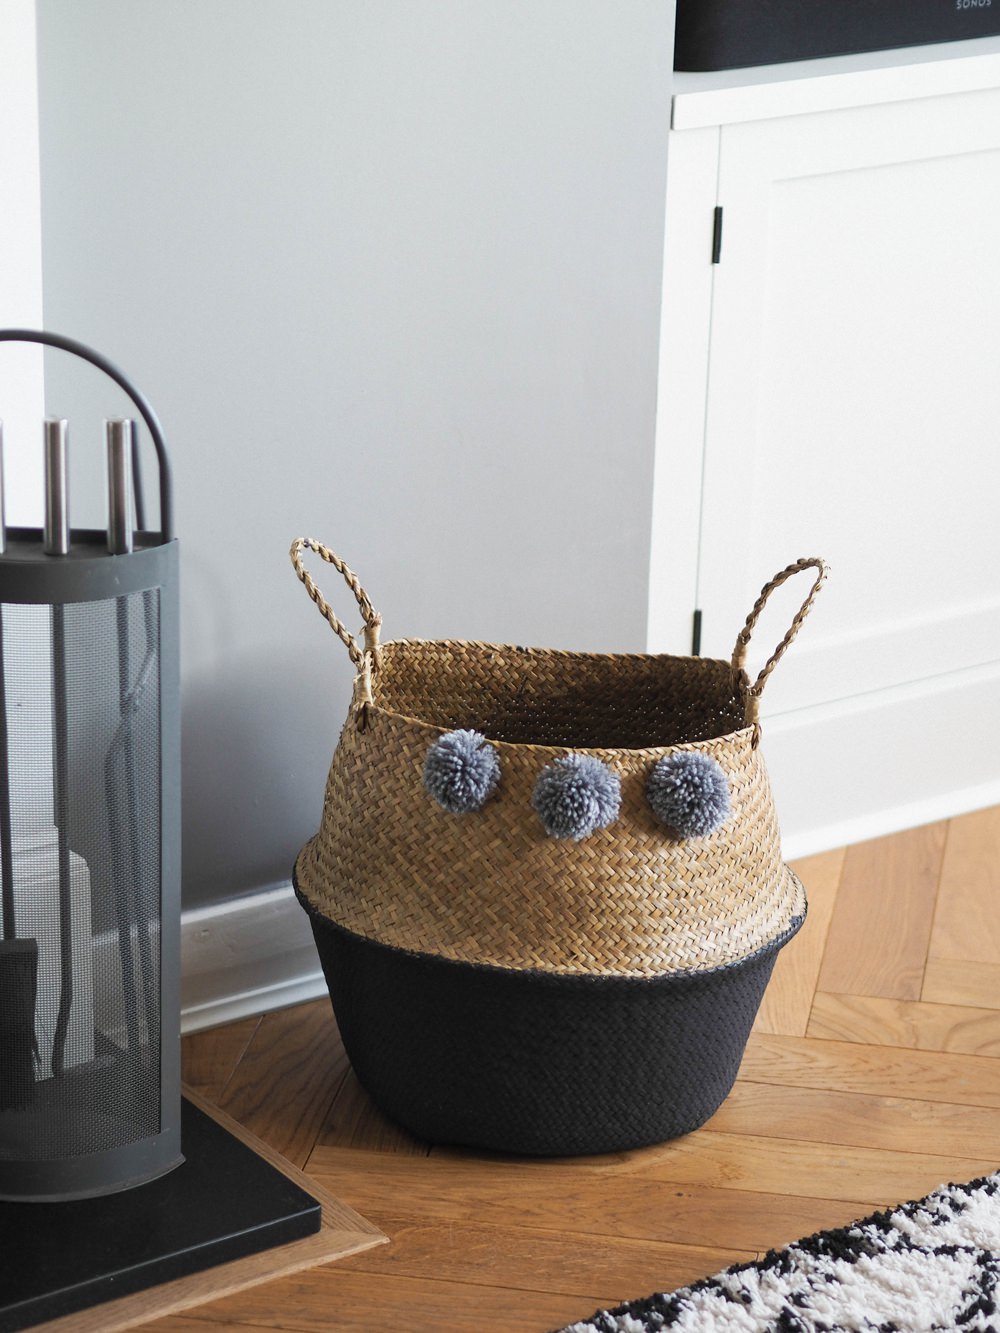
I bought belly baskets from eBay and made my own wool pom poms to attach and the velvet style cushions are from H&M. The floor lamp was from B&Q (they don’t seem to sell our colour now) and the table lamp from Dunelm.
The rainbow crochet blanket I made myself, the rainbow print behind the sofa and the home portrait were gifted to me from Etsy, the large candle and candle holder are from The White Company and the side table from Argos.


So there we have our 1930s living room renovation, which has now been well lived since we completed it. I have still been tweaking and adding bits and I am sure it will continue to grow for us as time goes on.
If you are planning a renovation, or are in the midst now, I hope you manage to enjoy the process, even if it’s stressful and dusty, it’s so worth it all in the end.

Proposed Changes to UK Marriage Laws: What You Need to Know The government has announced what it calls the biggest overhaul of marriage laws in England and Wales since the 19th century. The proposals aim to make weddings more flexible, boost the hospitality industry, and give couples more choice over where and how they marry. […]
Read More
One of the first decisions couples face when planning their wedding is whether to invite kids. Children can bring something special to the event and might even have their own roles as ring bearers or flower girls, but they also come with extra planning considerations. There’s no right or wrong answer. It’s your wedding after […]
Read MoreYou May Also Like
Explore more posts from the blog
Want In On Our Happy Wedding Letter?
Join over a thousand engaged couples (and counting) who have snagged our fun no-nonsense regular wedding advice and inspo straight to their inbox. Plus you'll get planning checklists & spreadsheets for absolutely nada.
© 2010 - 2026. Whimsical Wonderland Weddings Ltd & Wedissimo Ltd. All Rights Reserved.
Leave a Reply