 Home
Home
 Suppliers
The Whole Works
The Whole Works
By Louise Baltruschat Hollis
If you’re looking at how to make your very own ribbon wands, this is the tutorial for you! I have step-by-step instructions, with photos and a video to make the tutorial a breeze to follow. Yay!

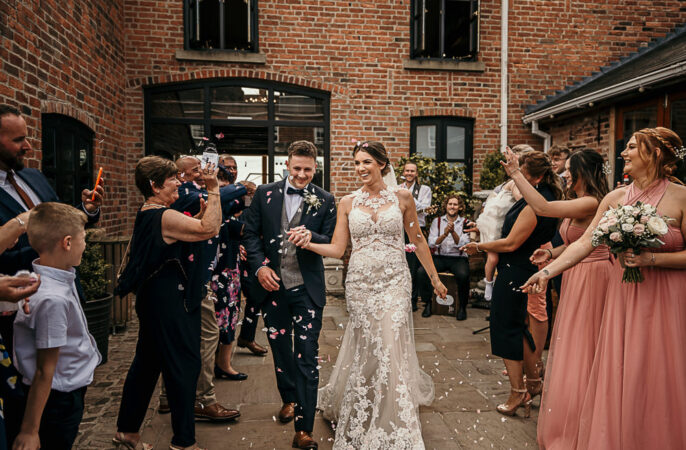
I will be teaching you how to recreate this cute and fun wand idea. Perfect as a wedding confetti alternative, as a wedding send-off, for your entrance to the reception or for flower girls or page boys to carry. Ribbon sticks would make a fun party accessory too, plus they look so lovely on display.

→ This post contains affiliate links, which means I may earn a commission if you make a purchase – at no additional cost to yourself.
I’ve also linked to the exact items I ordered to make ordering for your craft super simple.

📌 Top Tip - When ordering your materials, consider the matching sizes. I went for 12mm x 30cm dowels and then chose the screw eyes to fit the diameter of the dowel (12mm). I then ensured I ordered ribbons that would comfortably fit through the screw eye, which were 10mm wide.
Prepare the ribbon by cutting it to equal lengths. I chose double the length of the dowel and added a little extra to account for the knot as well as ensure it has a lovely drape. It’s a good idea to experiment, but be sure to have enough ribbon for all your wands!

It’s a good idea to sand the dowel to ensure the sides and ends are smooth and free from splinters.

Pushing firmly, make a dent/pilot hole in the centre of the dowel with the screw eye.

Begin to screw in the screw eye into the top of the dowl. If this is proving tricky, try using pliers to hold the screw eye in place. You will need to push quite firmly, but once it starts screwing you’ll be off.

Ensure the screw eye is screwed down so that only the hook is showing and not the thread.

Gather your ribbon together as neatly as you can.
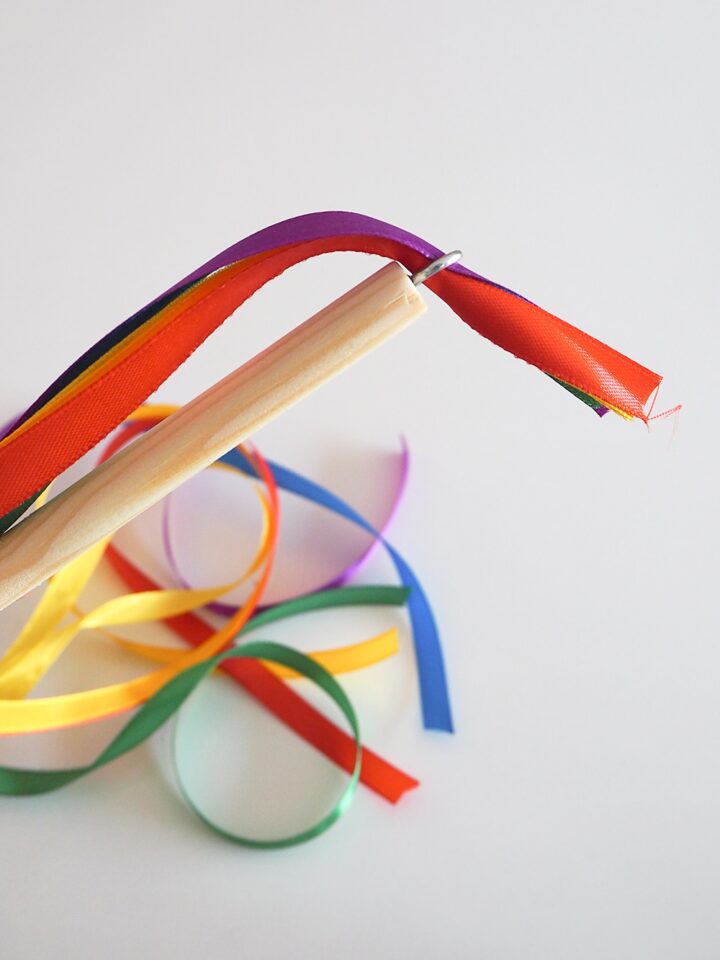

You can then start to thread the ribbon through the screw eye. You may need to fold the ribbon slightly to fit it through.
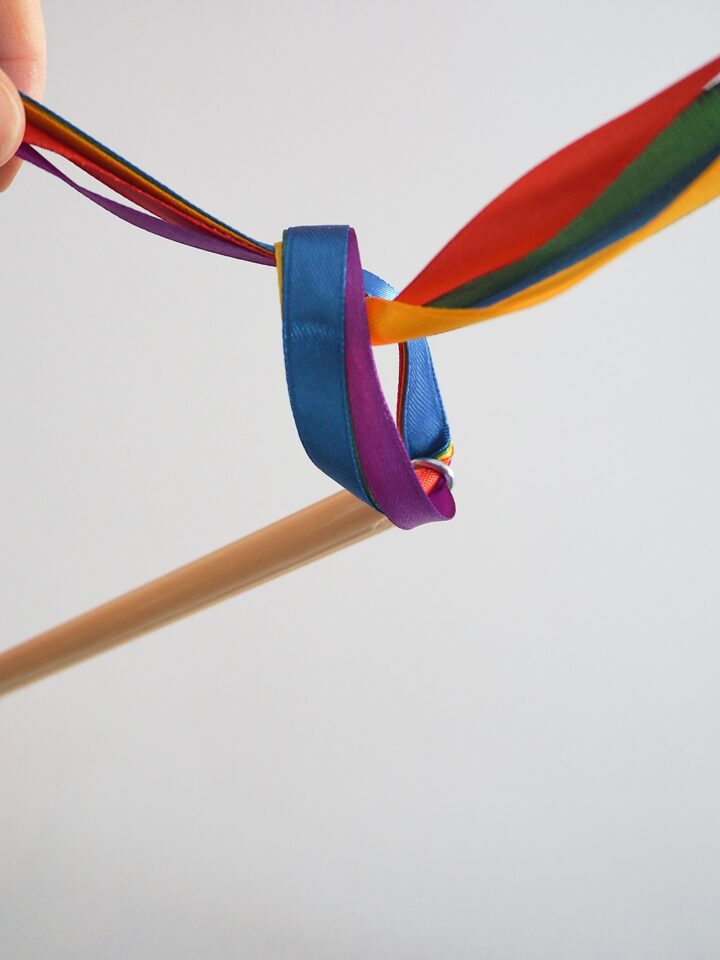

Make sure your ribbon is central, then tie a simple knot. Try to leave equal ribbon tassels at either end for a full effect.

Be sure that your knot is pulled tight. You could always use a glue gun to secure the ribbon more firmly with a dab of glue.

Thread a jingle bell onto one of the ribbon strands.

Secure with a simple knot to ensure it doesn’t fall off. The bells I used had a handy tab to thread through.

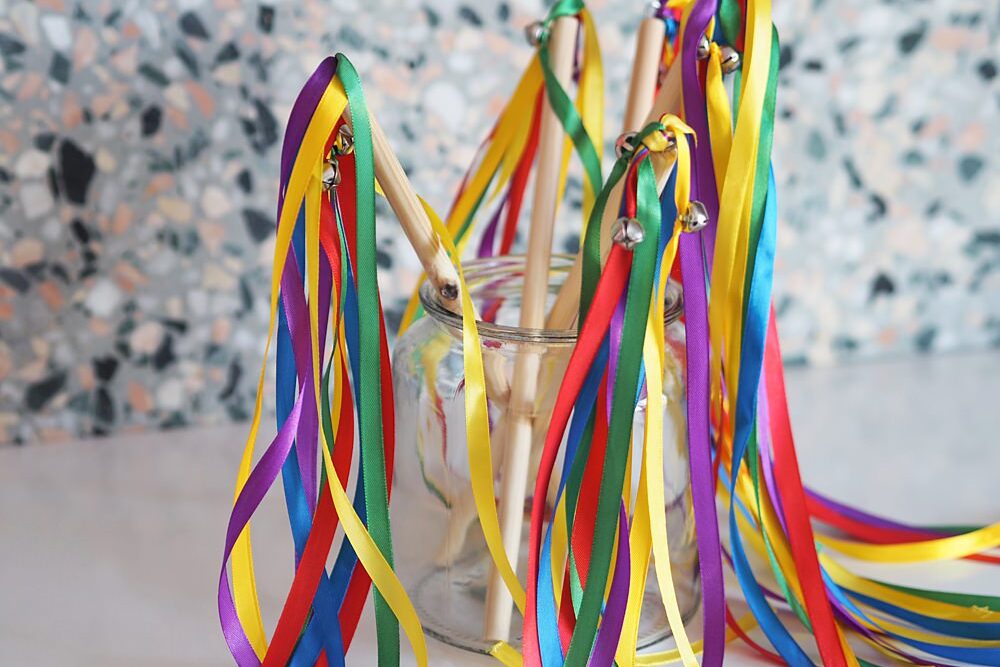
And your ribbon wand is complete! You can always add more jingle bells if you wish and now it’s time for happy waving 🎉 Woohoo!

Try experimenting with ribbon colours, lengths and textures. You can add more bells or embellishments, or have zero. How about decorating the wand handle too?
And that's a wrap! I hope you enjoyed this tutorial and it helped you to create your own ribbon wands with ease. Now its time to enjoy them!

Proposed Changes to UK Marriage Laws: What You Need to Know The government has announced what it calls the biggest overhaul of marriage laws in England and Wales since the 19th century. The proposals aim to make weddings more flexible, boost the hospitality industry, and give couples more choice over where and how they marry. […]
Read More
One of the first decisions couples face when planning their wedding is whether to invite kids. Children can bring something special to the event and might even have their own roles as ring bearers or flower girls, but they also come with extra planning considerations. There’s no right or wrong answer. It’s your wedding after […]
Read MoreYou May Also Like
Explore more posts from the blog
Want In On Our Happy Wedding Letter?
Join over a thousand engaged couples (and counting) who have snagged our fun no-nonsense regular wedding advice and inspo straight to their inbox. Plus you'll get planning checklists & spreadsheets for absolutely nada.
© 2010 - 2026. Whimsical Wonderland Weddings Ltd & Wedissimo Ltd. All Rights Reserved.

Leave a Reply